Welcome to the world of ZimaOS! I mean new friends who have come from other brand camps such as Synology, hello!
ZimaOS is a game-changer for NAS enthusiasts, pro users and studio users. Its intuitive interface simplifies data backup and management, ensuring your critical files are always secure. ZimaOS excels in Docker application installation, streamlining the process with just a few clicks.
We are honored that you have chosen ZimaCube as the first hardware to experience ZimaOS. In order to help everyone quickly transfer files from Synology devices to ZimaCube, we have prepared this tutorial.
Of course, transferring files to ZimaCube is very easy. Let’s get started.
This tutorial is also applicable to other devices with ZimaOS installed.
SMB/SAMBA will be our method
SMB (Server Message Block) is a protocol built into the Windows system for sharing files and other services over the network. SAMBA implements the SMB protocol, which enriches the file sharing methods of * nix-like systems.
Both ZimaOS and Synology DSM are well-implemented/compatible with SMB, whether through SAMBA or self-implementation, making file sharing and transfer very convenient.
Mount shares from DSM in ZimaOS
At the beginning of Synology setup, many users set up sharing when creating directories; some users did not give sharing function when creating directories. Therefore, before migrating, you may need to create a new shared directory and then move the data you want to migrate to this shared directory.
Go to the ZimaOS Dashboard and launch the Files App. Then, in the left navigation bar of the Files App UI, find the “+” sign next to Storage and click it, then click “LAN Storage”.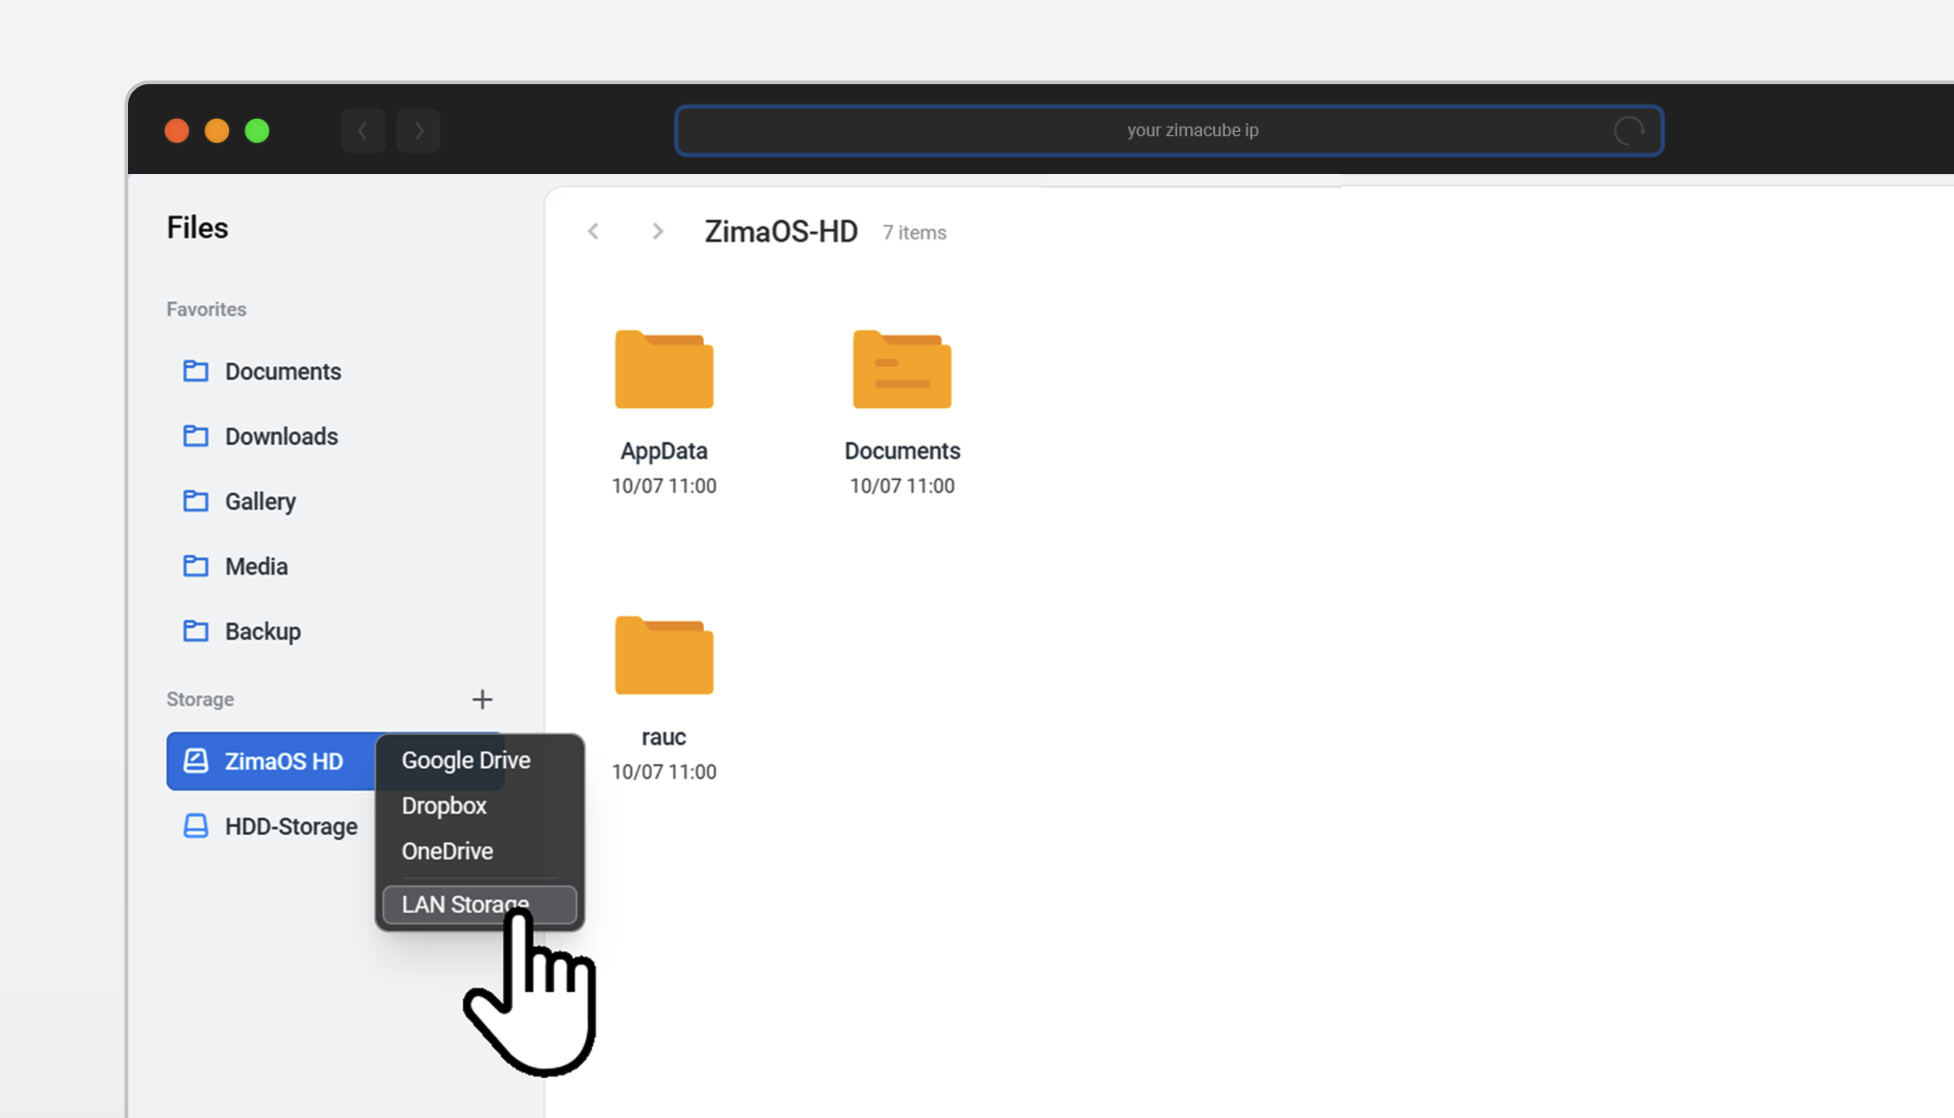
In the pop-up window, enter the Synology DMS IP Address. Mine is 10.0.0.11 here and you need to fill in the correct IP Address of your device. Now click the Connect button.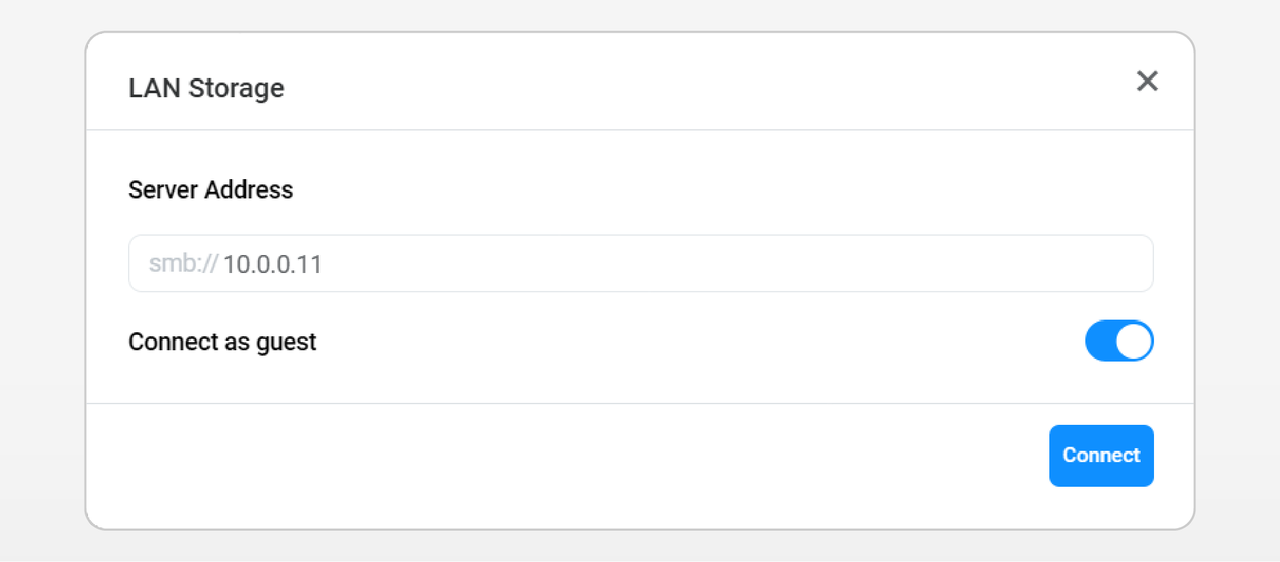
If your DSM shared account is not a Guest, but an account specifically set up with a user and password, you need to enter the correct DSM account and password here.
Copy and paste files from Synology DSM in ZimaOS
When you click the Connect button and successfully connect, Synology will appear as a network device under Storage. And on the right side, the shared directory of Synology will appear.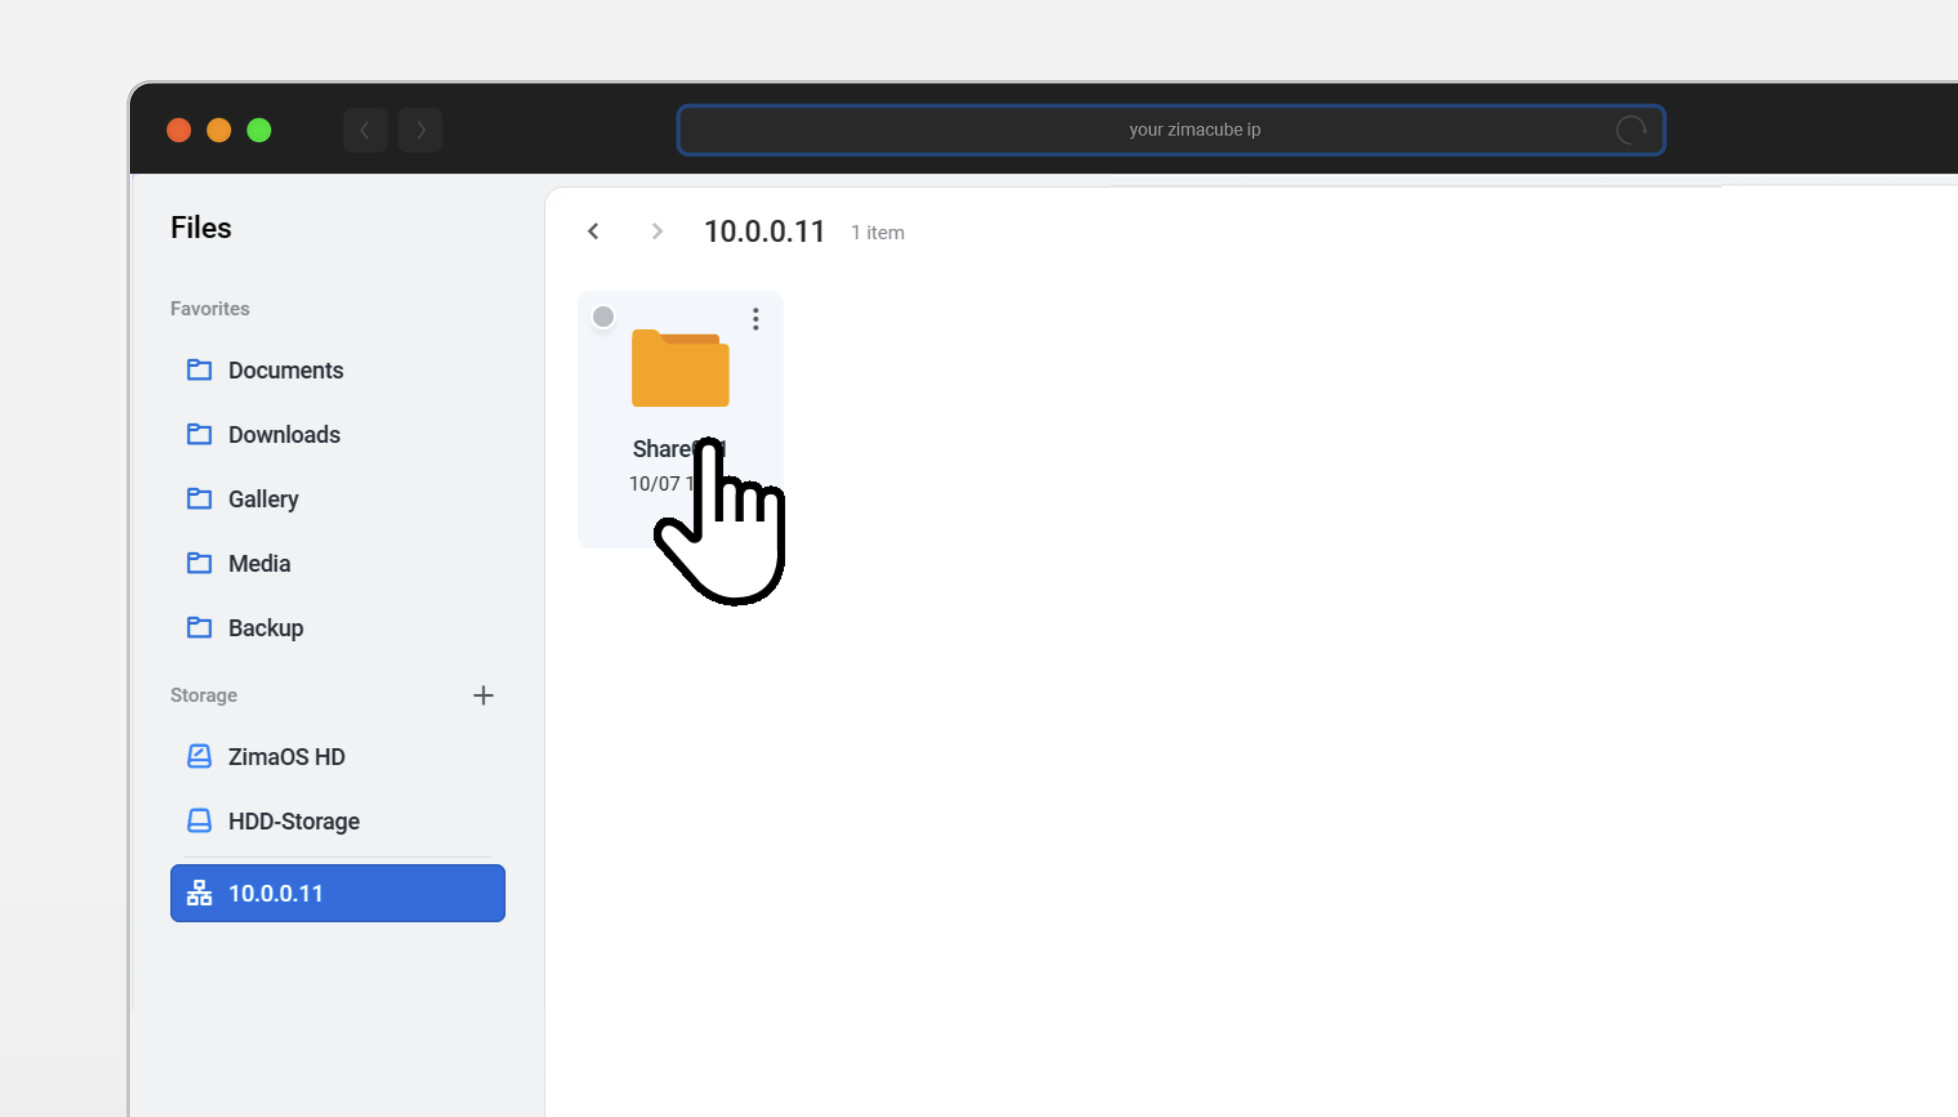
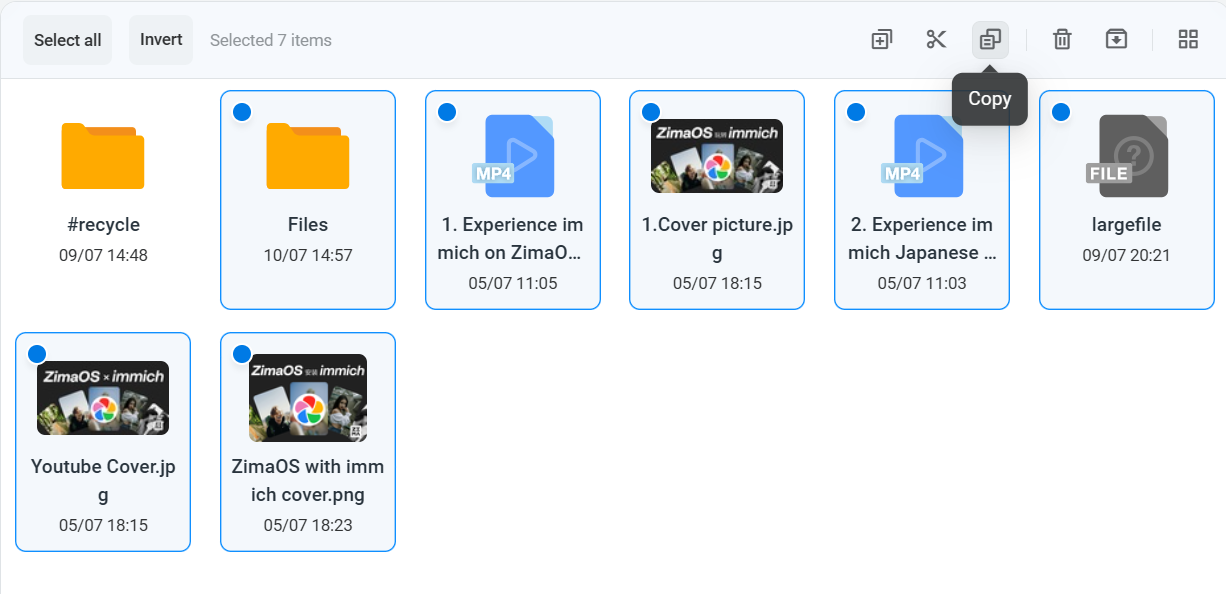
Go to the shared directory and select the files and directories we want to migrate. You can press Ctrl + A to select all files. Then, click the Copy button in the upper right corner.
Now enter the ZimaOS storage area. Go to the target directory and select the Paste xx items button in the upper right corner.
[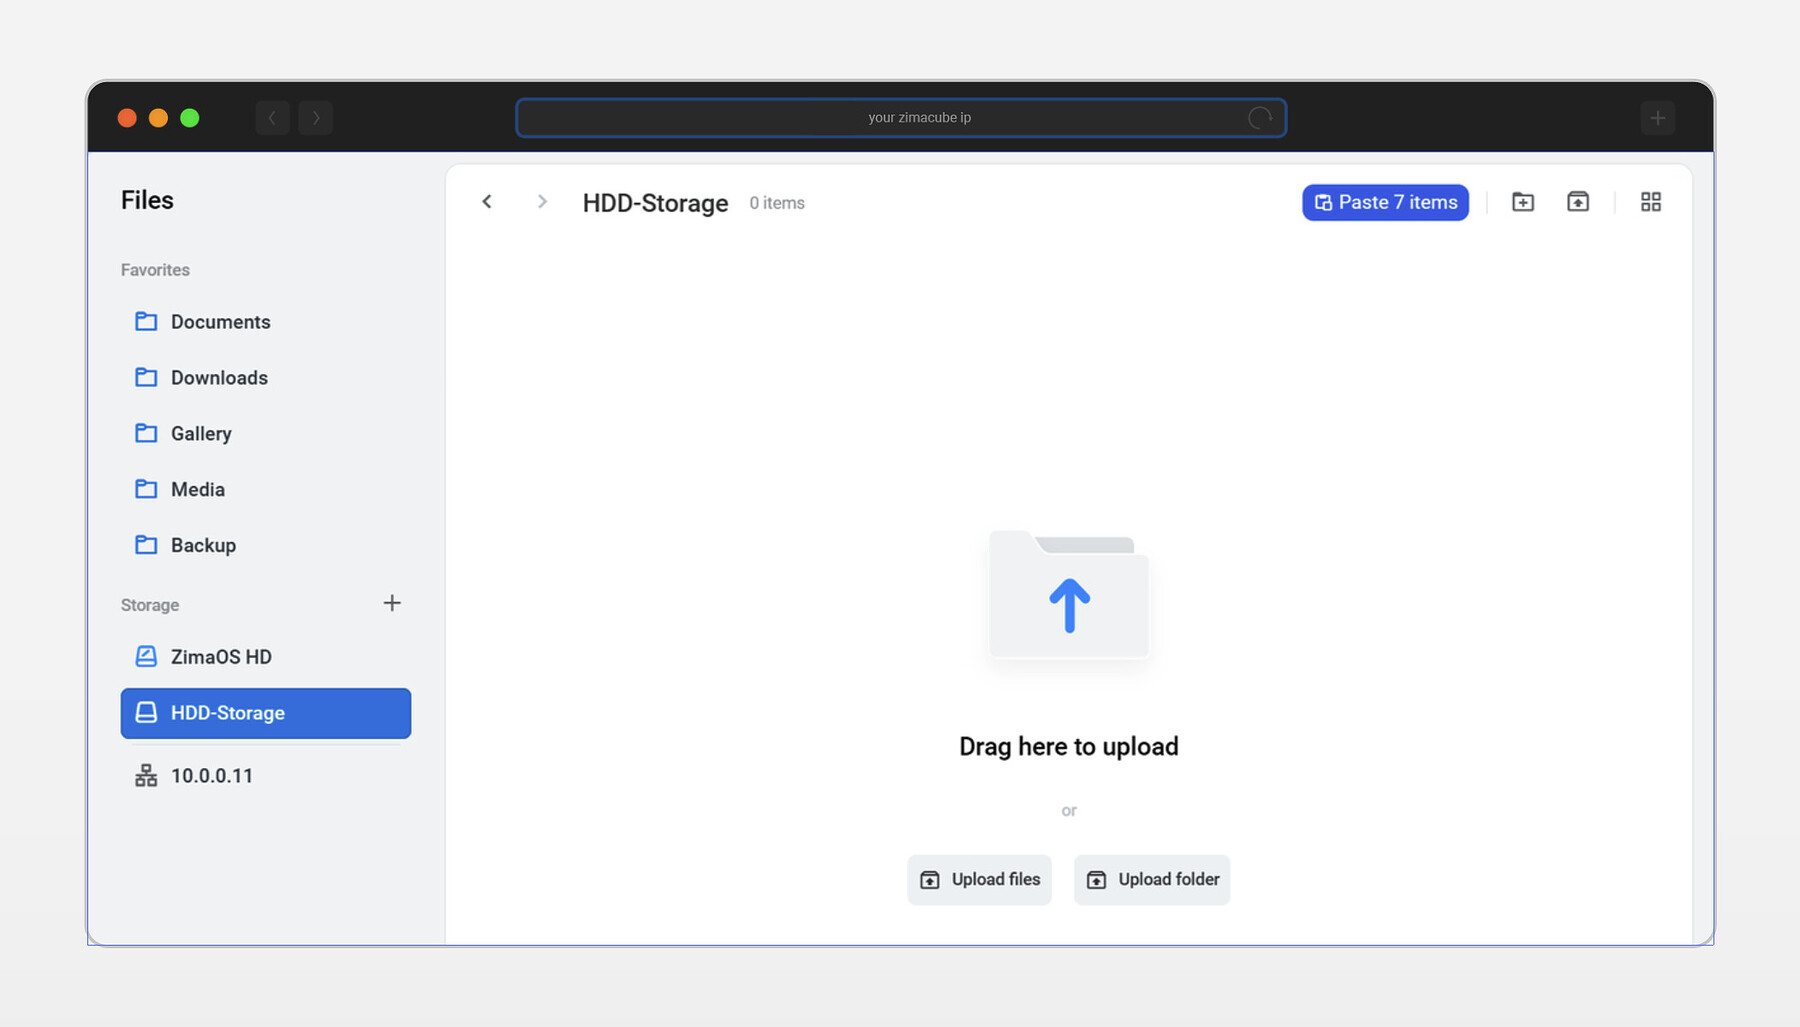
You need to ensure that the remaining capacity of the destination storage pool is greater than the total volume of the file to be copied and pasted.
Now, wait for the file migration to complete. After the migration is complete, please experience the convenience that ZimaOS brings to your data management!