ZimaOS 3 is a game-changer for NAS enthusiasts, pro users and studio users. Its intuitive interface simplifies data backup and management, ensuring your critical files are always secure. ZimaOS excels in Docker application installation, streamlining the process with just a few clicks.
Have you ever thought about what is behind the glamorous UI of ZimaOS? Today, we use another interface to access our ZimaOS.
GUI (Graphical User Interface) offers a visual interactive experience with icons and menus, designed for intuitive navigation, catering to users of all skill levels with its ease of use. CLI (Command Line Interface), on the other hand, is a text-driven interface for executing commands, favored by experts for its efficiency and scripting capabilities.

Three Ways to Enter CLI on ZimaOS
Method 1: Use your keyboard and screen
Connect your Zima device to a keyboard and a screen. When you start up, ZimaOS will display an interface like this on the screen: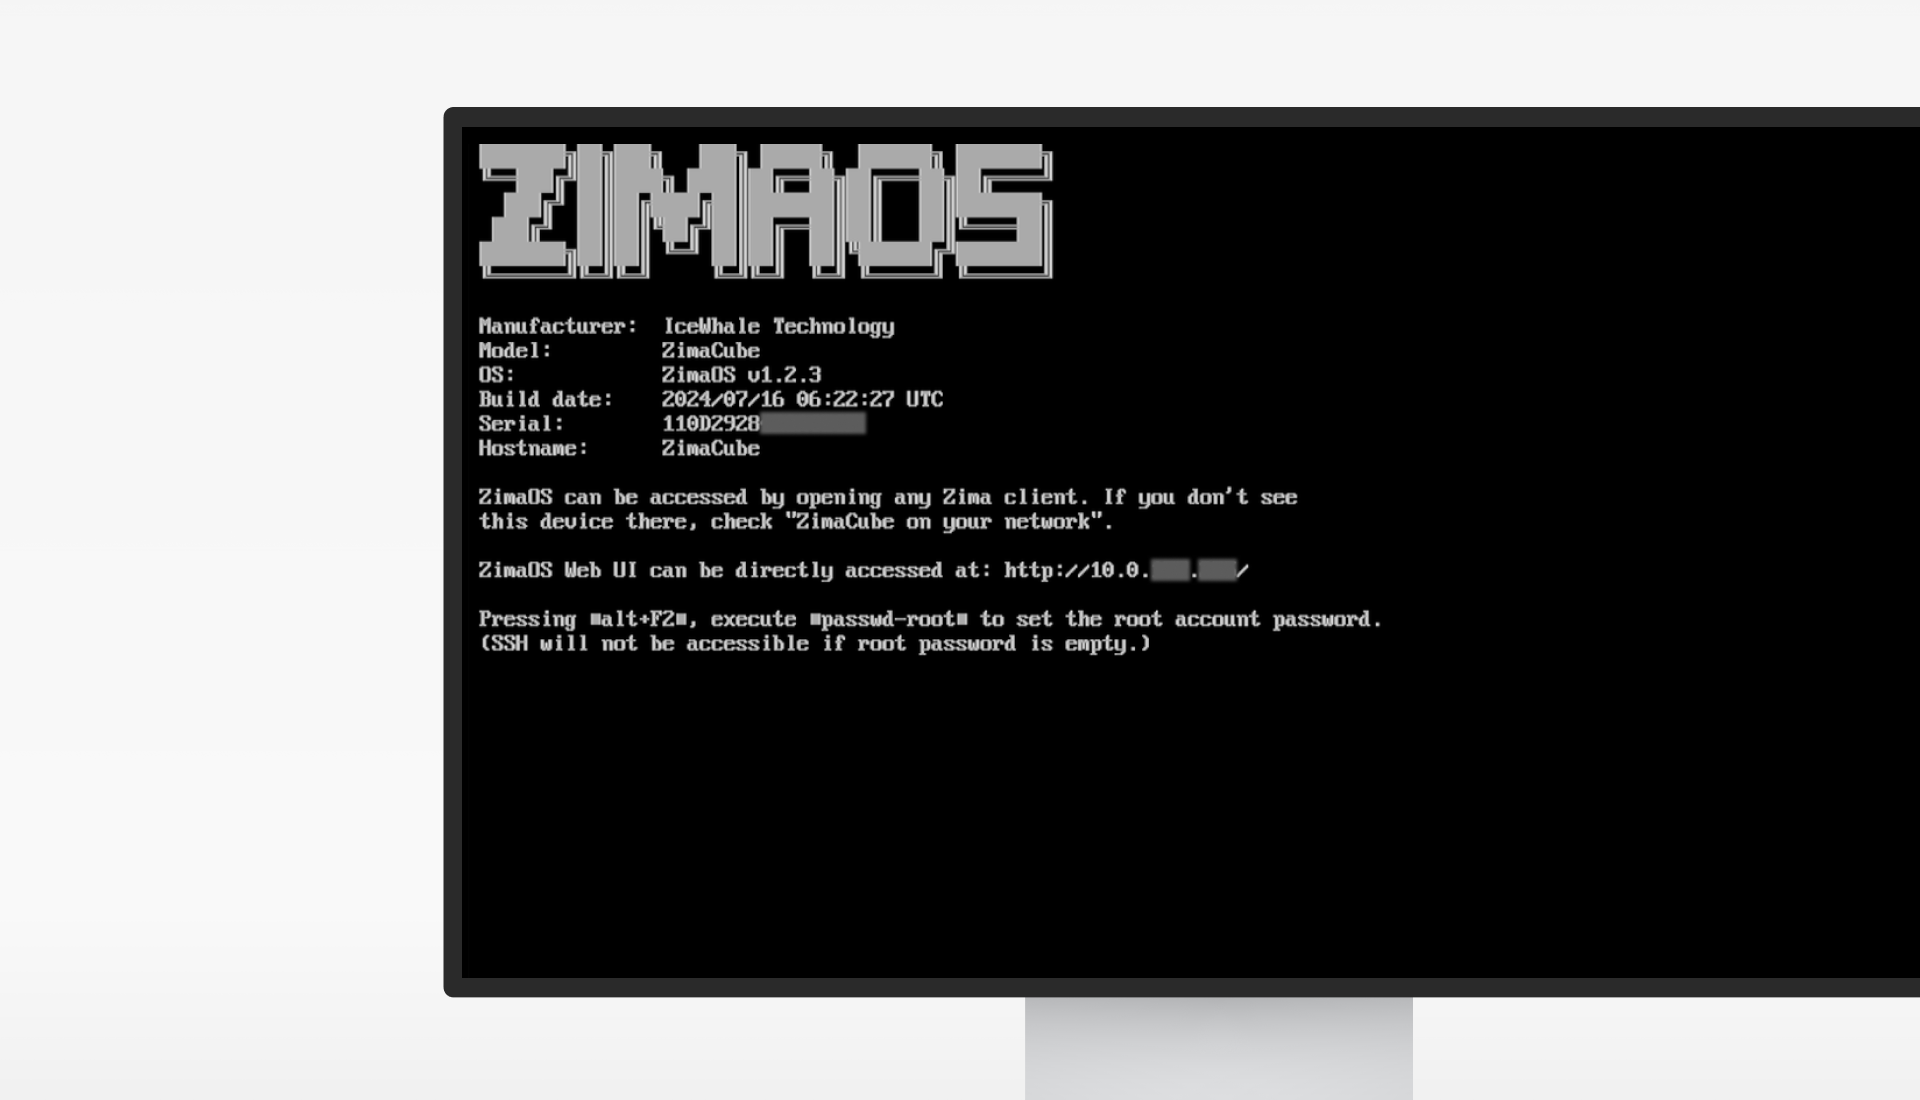
Press Alt+F2, and you will enter a login page. Now, input root and press Enter. If this is the first time you enter this page, you will not need a password and be in ZimaOS’ CLI directly. We recommend you set a password for your root account. Input passwd-root and this tool will prompt you to set the password for root. Keep this in mind that a password for root is necessary for SSH login.
Method 2: Use your SSH Client
SSH is a widely used remote access method. ZimaOS can also be accessed using SSH.
Again, a password for root is necessary for SSH login. See the content above.
Open a terminal. Here, we use Windows terminal as an example. Input ssh root@youZimaOSIP and press Enter. You will be prompted to trust a key fingerprint and input the password. After that, you will be in ZimaOS’ CLI through SSH.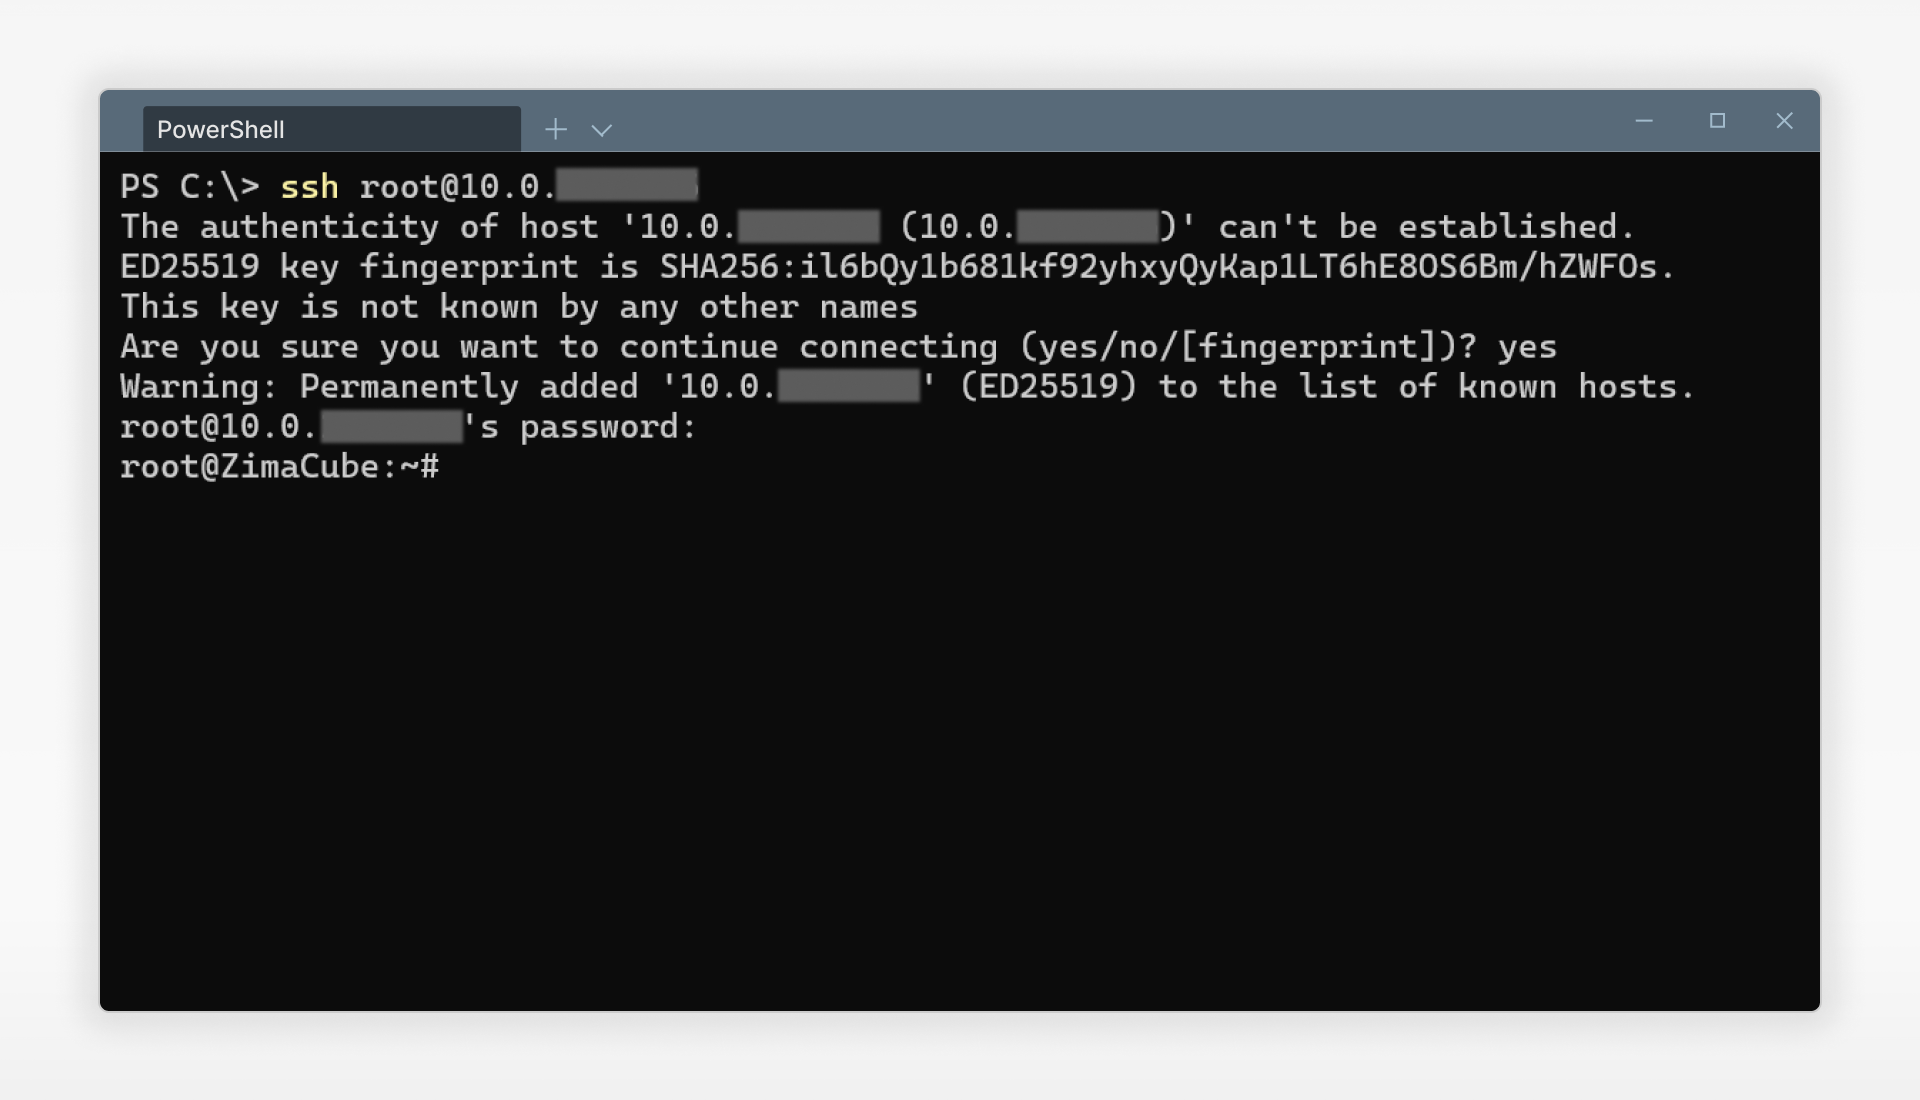
Method 3: Use the ttydBridge app
This is the suggested way to use CLI on ZimaOS. Login into ZimaOS’ WebUI through your Zima device’s IP. On ZimaOS’ WebUI, we can install the ttydBridge from our app store.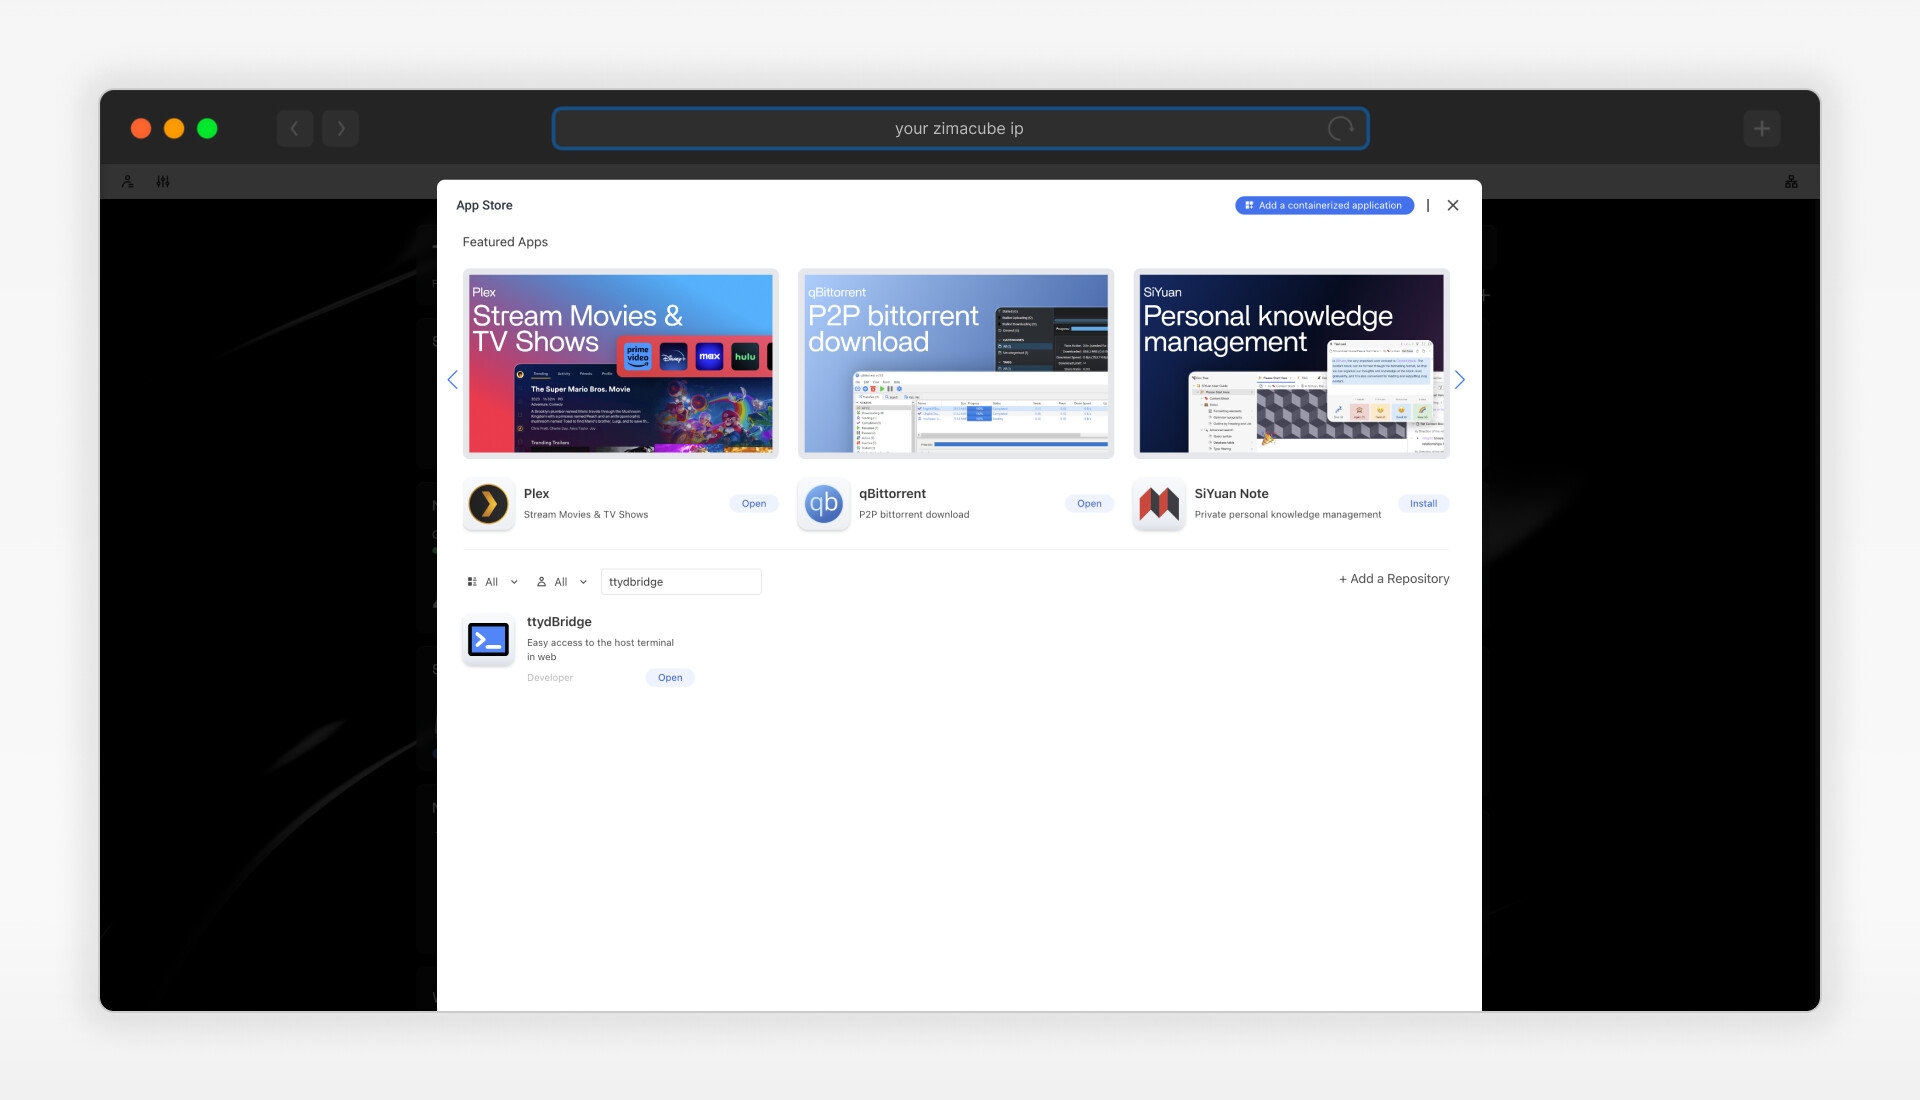
After installation, launch the ttydBridge from dashboard and it will prompt you to enter the username and password. Since you have logged into our WebUI, you can enter default admin as username and password as password for ttydBridge. Now, you will see a beautiful CLI like this: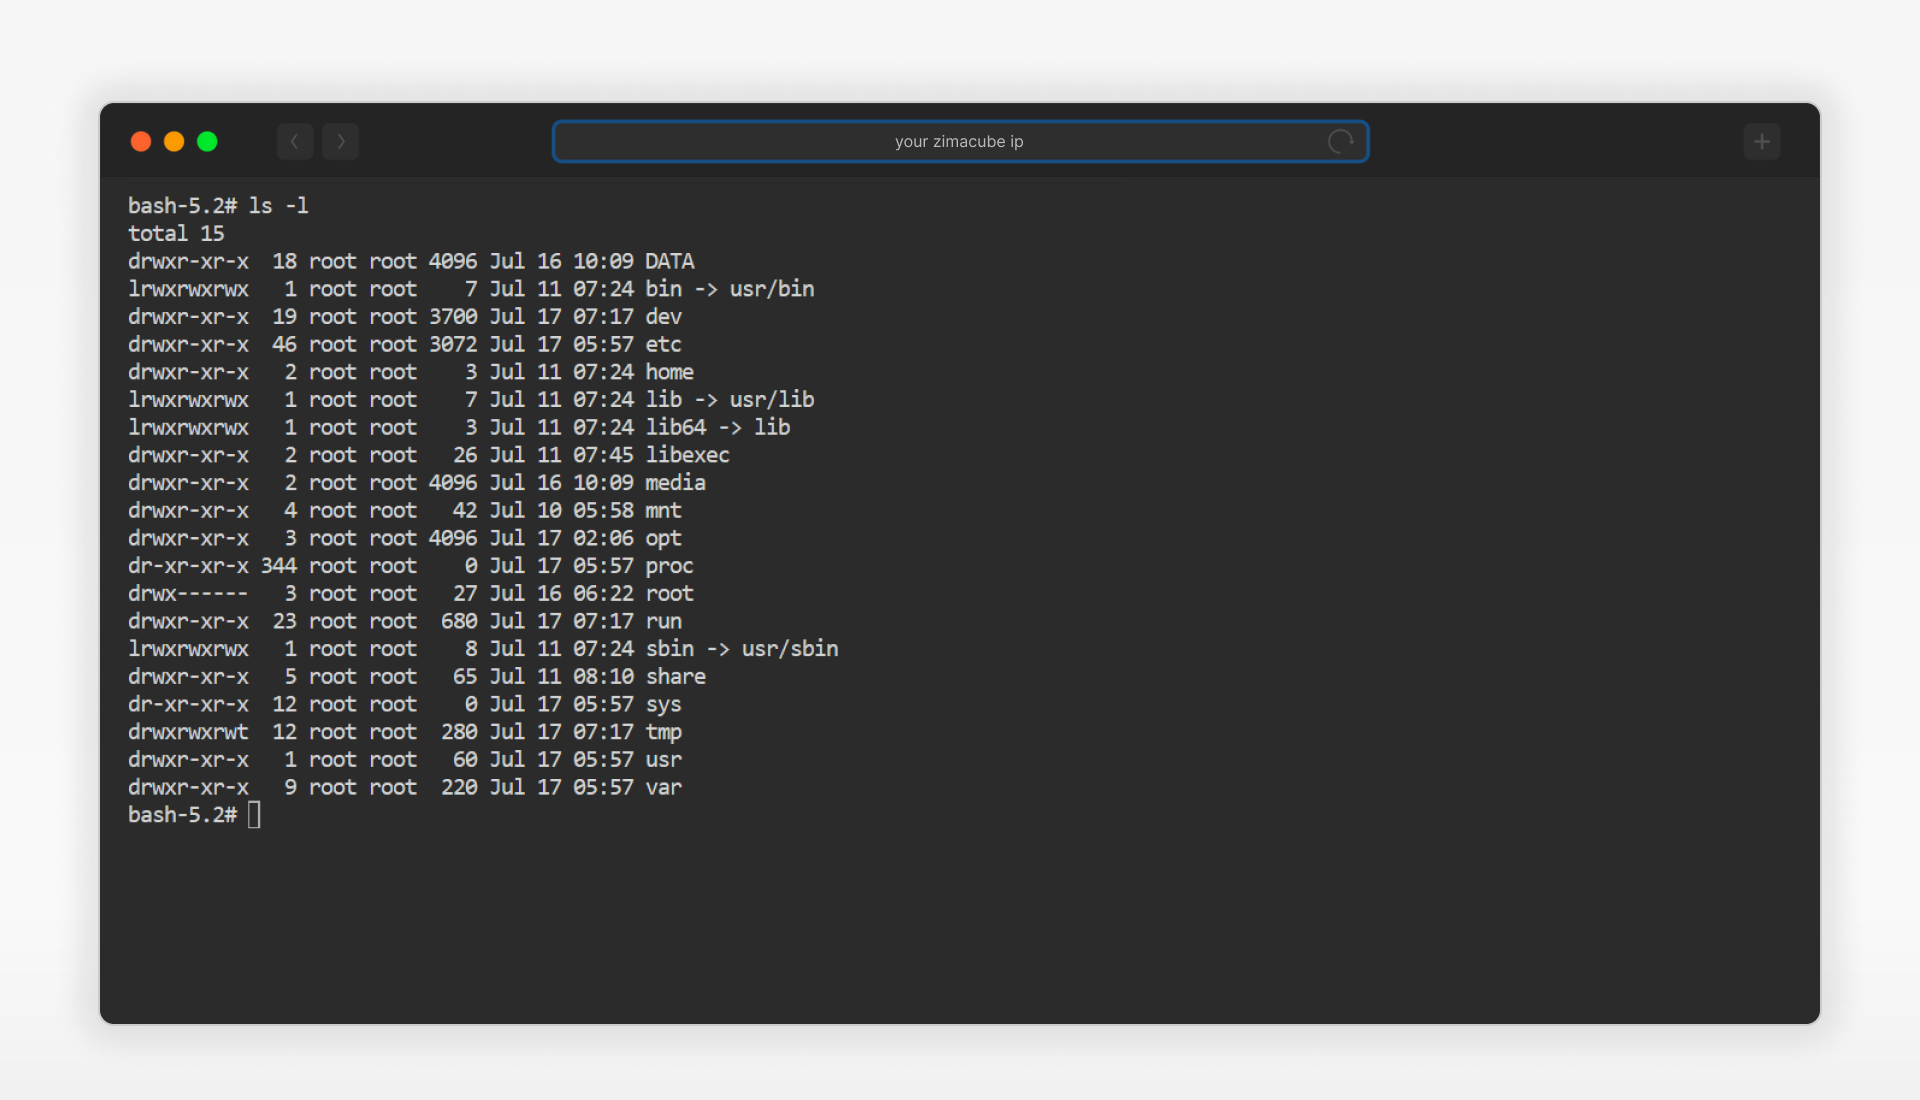
Differences and Common Commands
For safety reasons, most system folders are read-only even if you log in as root, which distinguishes ZimaOS’ file system from other linux distributions.
User data and app data will be put in /DATA. Feel free to use commands to create, delete, modify files and folders inside /DATA’s subdirectories. Of course, we recommend you create a new sub-folder inside /DATA to do these experiments.
Here we also share with you some commonly used commands and tools.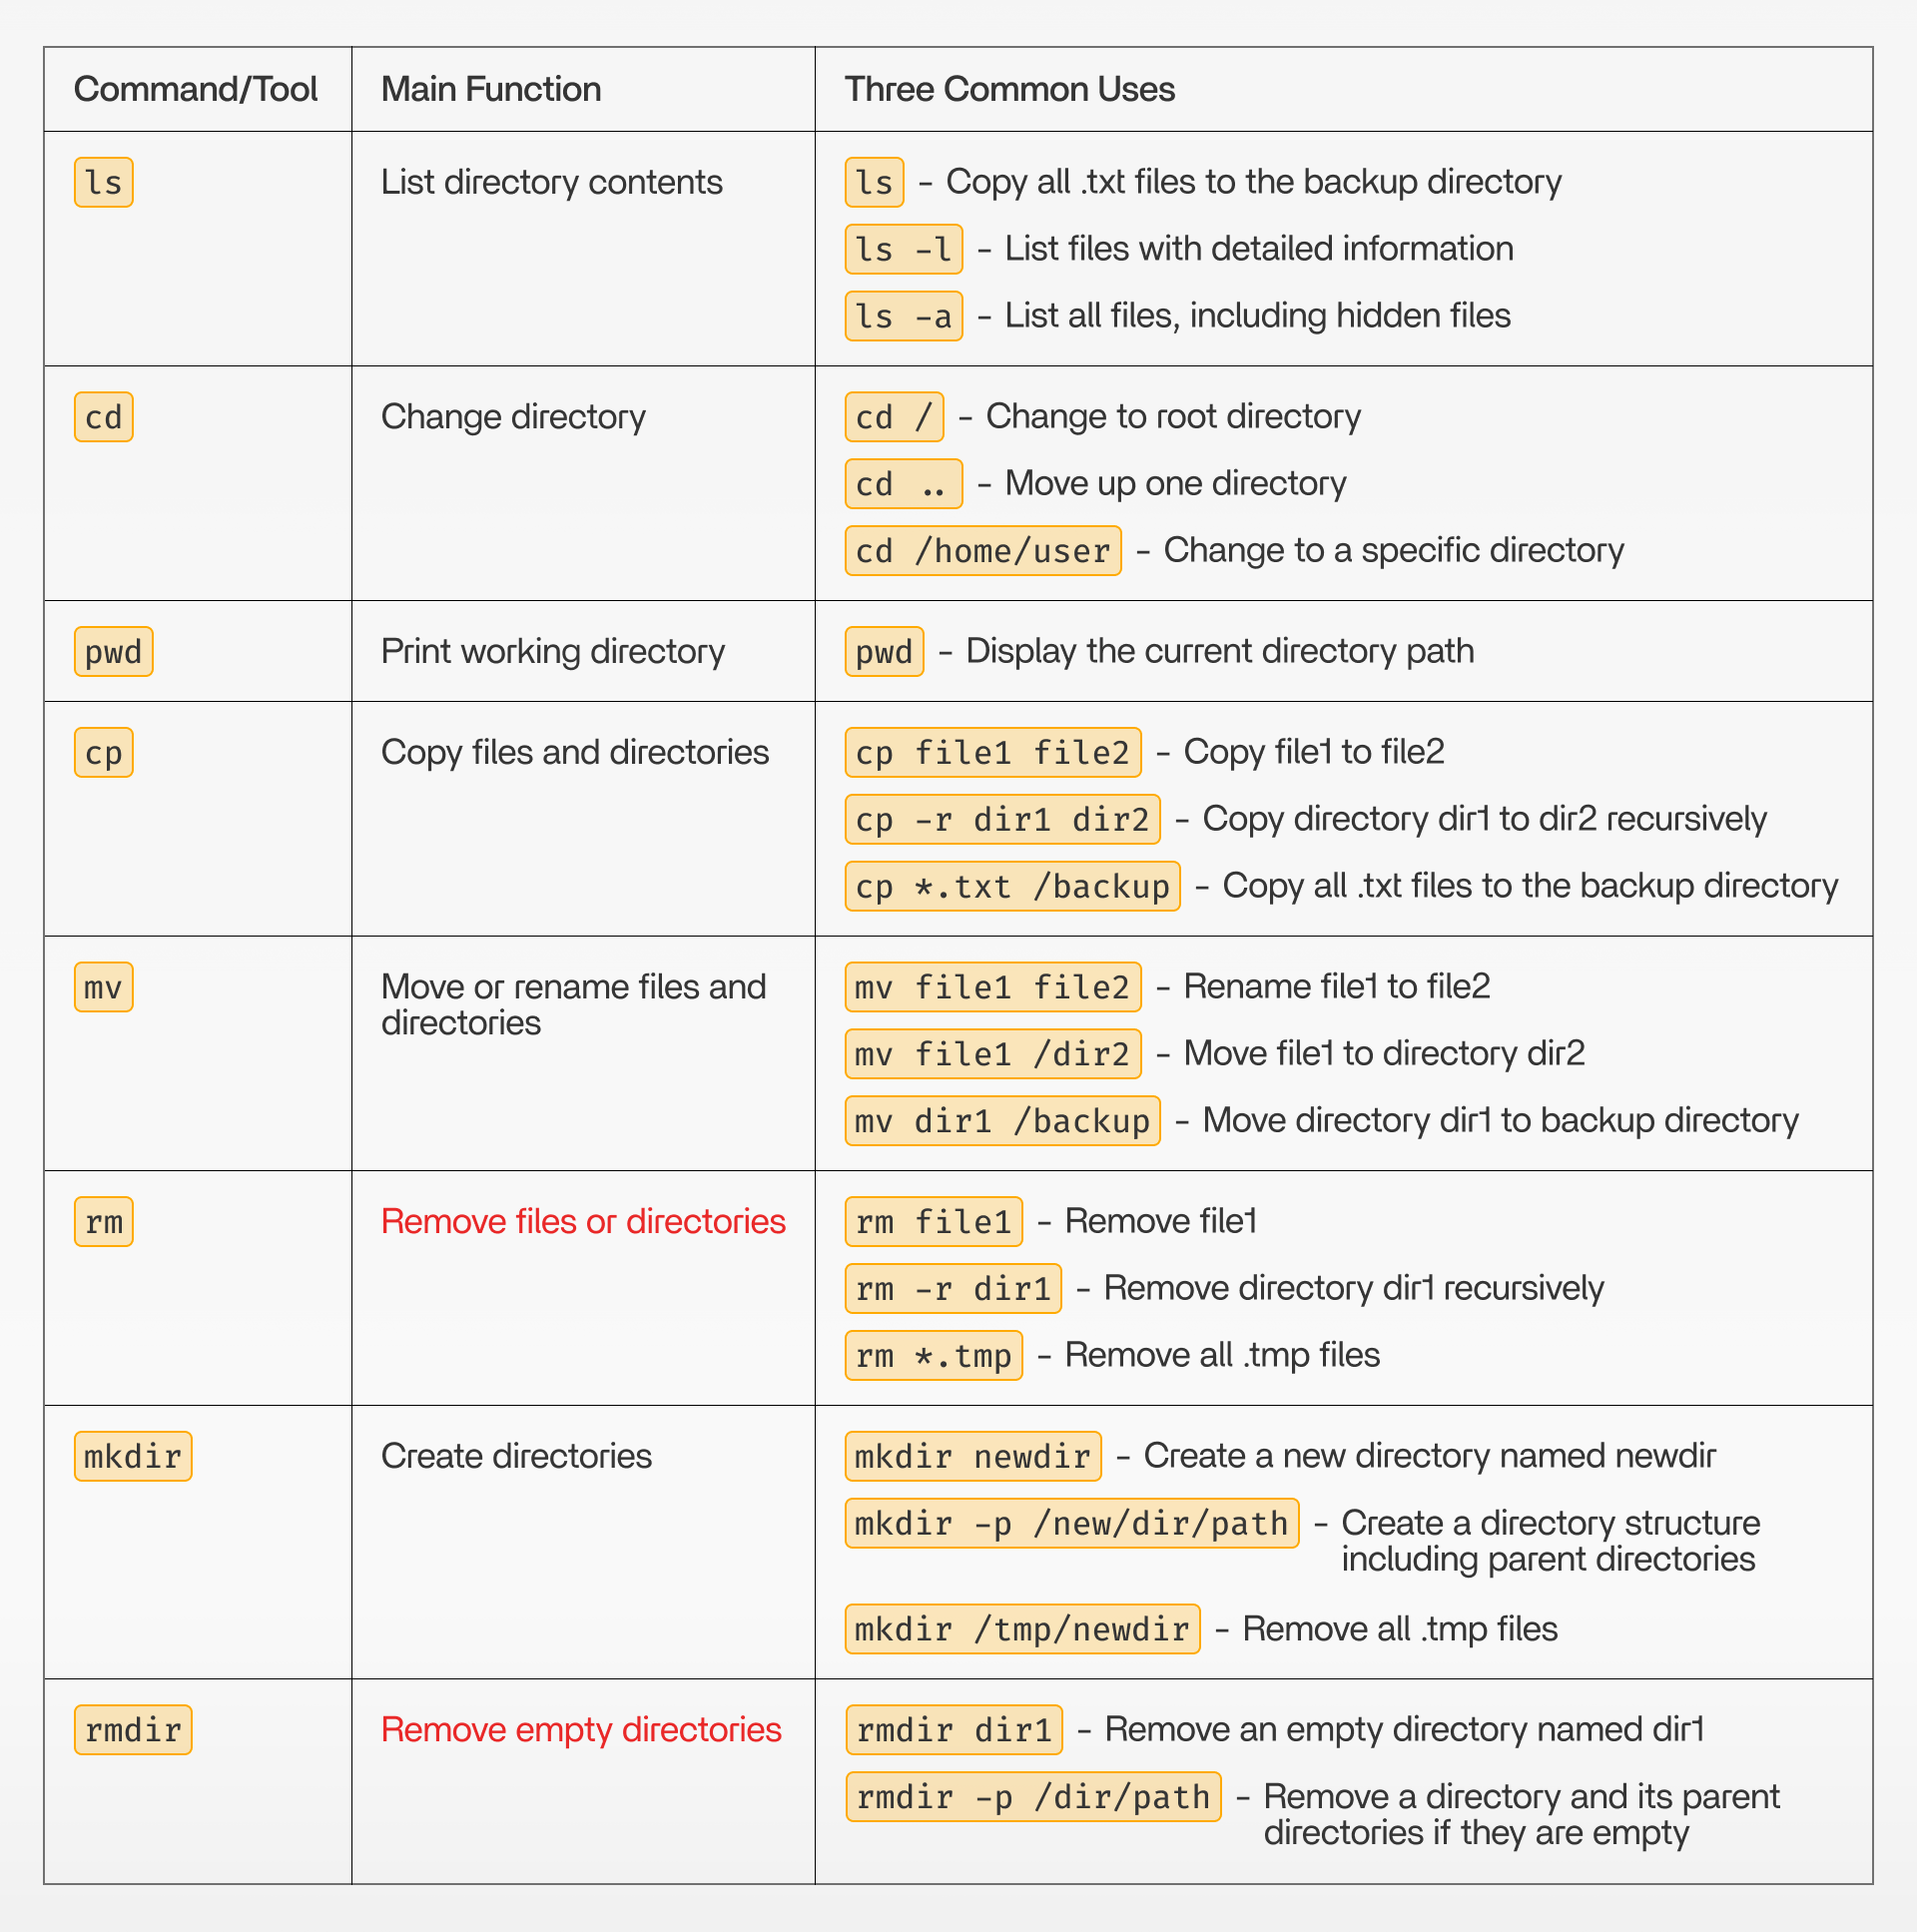
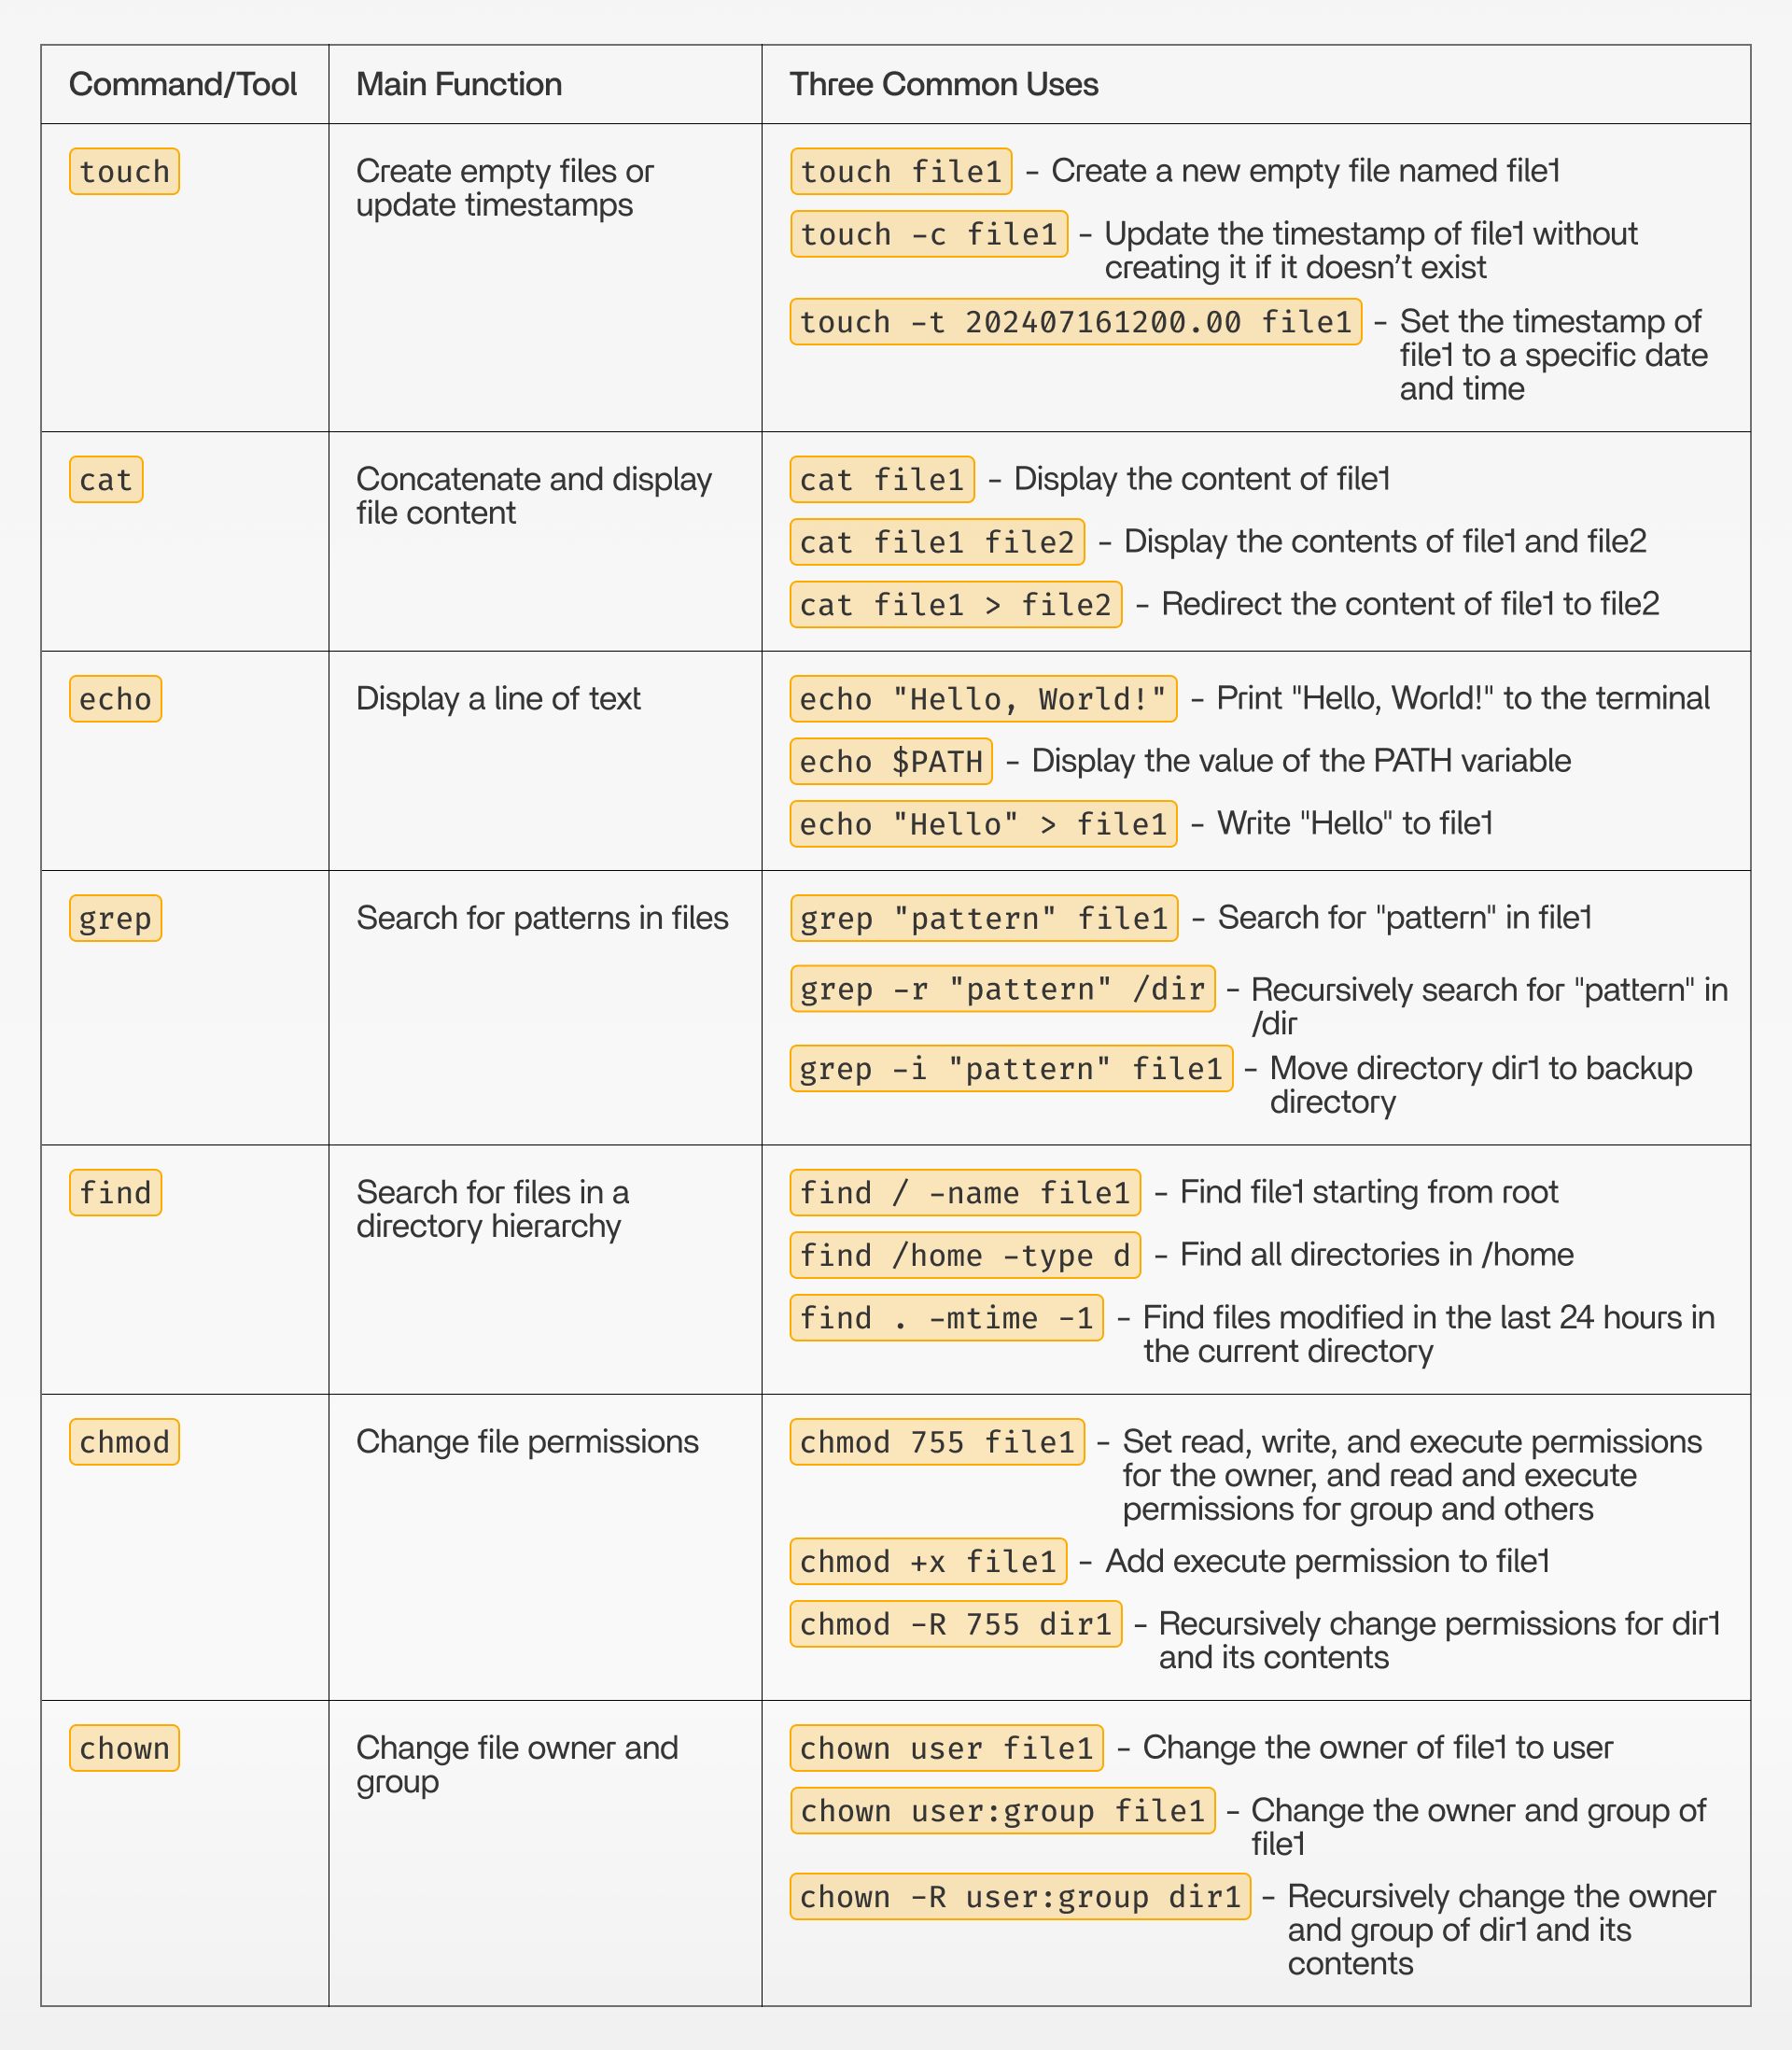
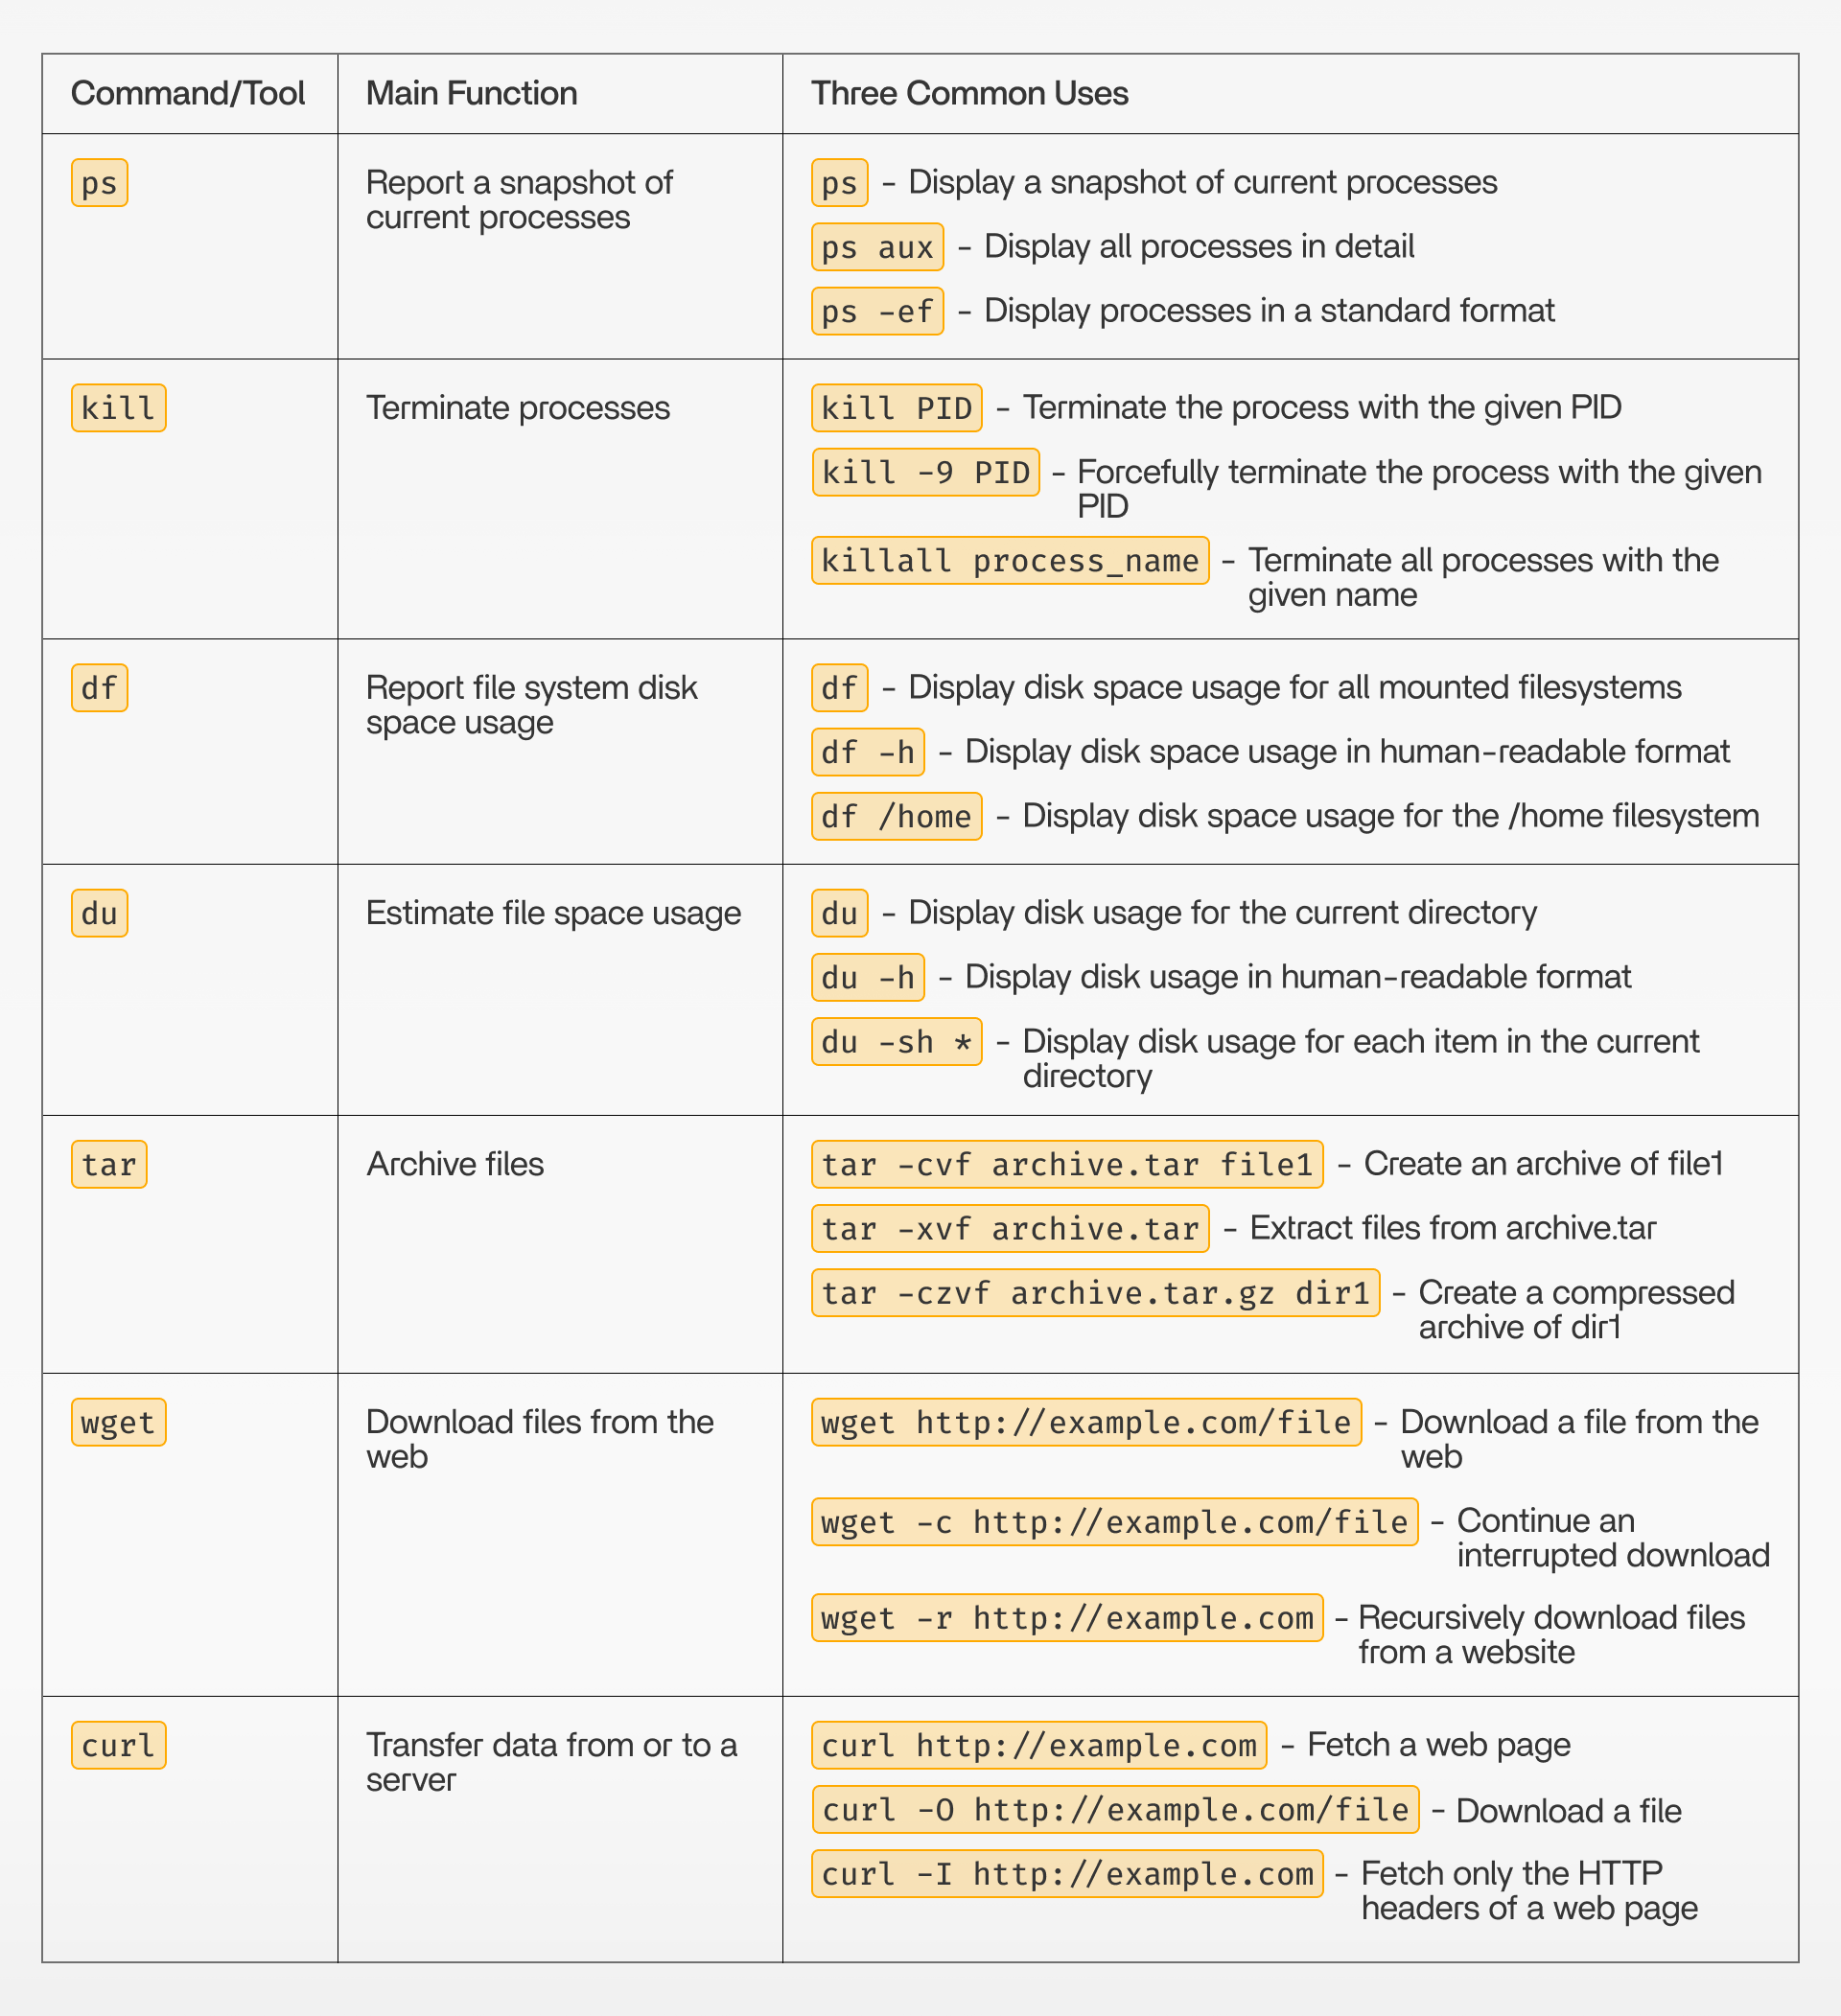
These commands all work well on ZimaOS. We hope this table helps you better understand how the CLI works on ZimaOS.
If you encounter any issues during use, feel free to let us know at any time. Just comment below. You can also join our Discord to discuss more about Docker app and ZimaOS. We look forward to your feedback!