Plex and GPU Transcoding
Plex Media Server is a versatile and popular platform for managing and streaming your media library. One way to significantly enhance its performance and transcoding capabilities is by harnessing the power of an Intel / NVIDIA GPU. In this guide, we’ll walk you through the steps to set up Docker Plex with Intel / NVIDIA GPU acceleration, allowing for efficient hardware transcoding and improved media streaming.
Why use Hardware-Accelerated Streaming?
To play your video smoothly and on a huge variety of devices, Plex Media Server often needs to convert the video to a different quality or a compatible format. Converting the video (transcoding) happens automatically, in real-time, while you’re playing it. Using the free, software-based transcoding in Plex Media Server, home computers can seamlessly convert and stream video in real-time to any Plex app. Some computers with more powerful processors can even stream multiple videos at once, especially at lower qualities.
To convert videos faster and with less processing power, you can turn on Hardware-Accelerated Streaming in Plex Media Server. When hardware acceleration is turned on, Plex Media Server will use the dedicated video decoder and encoder hardware support in your computer/device to convert videos, letting you stream HD or 4K video more smoothly and stream to more devices at once. And if you use the same computer for both work and play, hardware acceleration uses less processing power during video streaming, giving you back the speed you need for your other activities.
Hardware-Accelerated Streaming has a number of advantages:
- Often, more videos can stream at the same time.
- Videos can start streaming faster and buffer less often.
- High-quality videos, especially 4K and HEVC videos, can stream more smoothly.
- By offloading CPU-intensive transcoding tasks to dedicated hardware, video streaming has less of a performance impact on your computer.
- Using the dedicated video decoding/encoding hardware is more energy-efficient and so will consume less power.
How to enable Hardware-accelerated streaming?
Hardware-accelerated streaming is a premium feature and requires an active Plex Pass subscription.
1. Using the built-in Intel GPU
ZimaCube uses Intel N100/1235U processors, both of which incorporate Intel’s latest integrated GPUs, both have very good hardware transcoding capabilities.
- Search for Plex from the app store and install it. (**If previously installed, update to the latest version. A fresh installation is recommended.**)
- Open the Plex Web app.
- Login with an account that has a Plex Pass.
- Navigate to Settings > Server > Transcoder to access the server settings.
- Turn on Show Advanced in the upper-right corner to expose advanced settings.
- Turn on Use hardware acceleration when available.
- Choose Hardware transcoding device: Alder Lake….
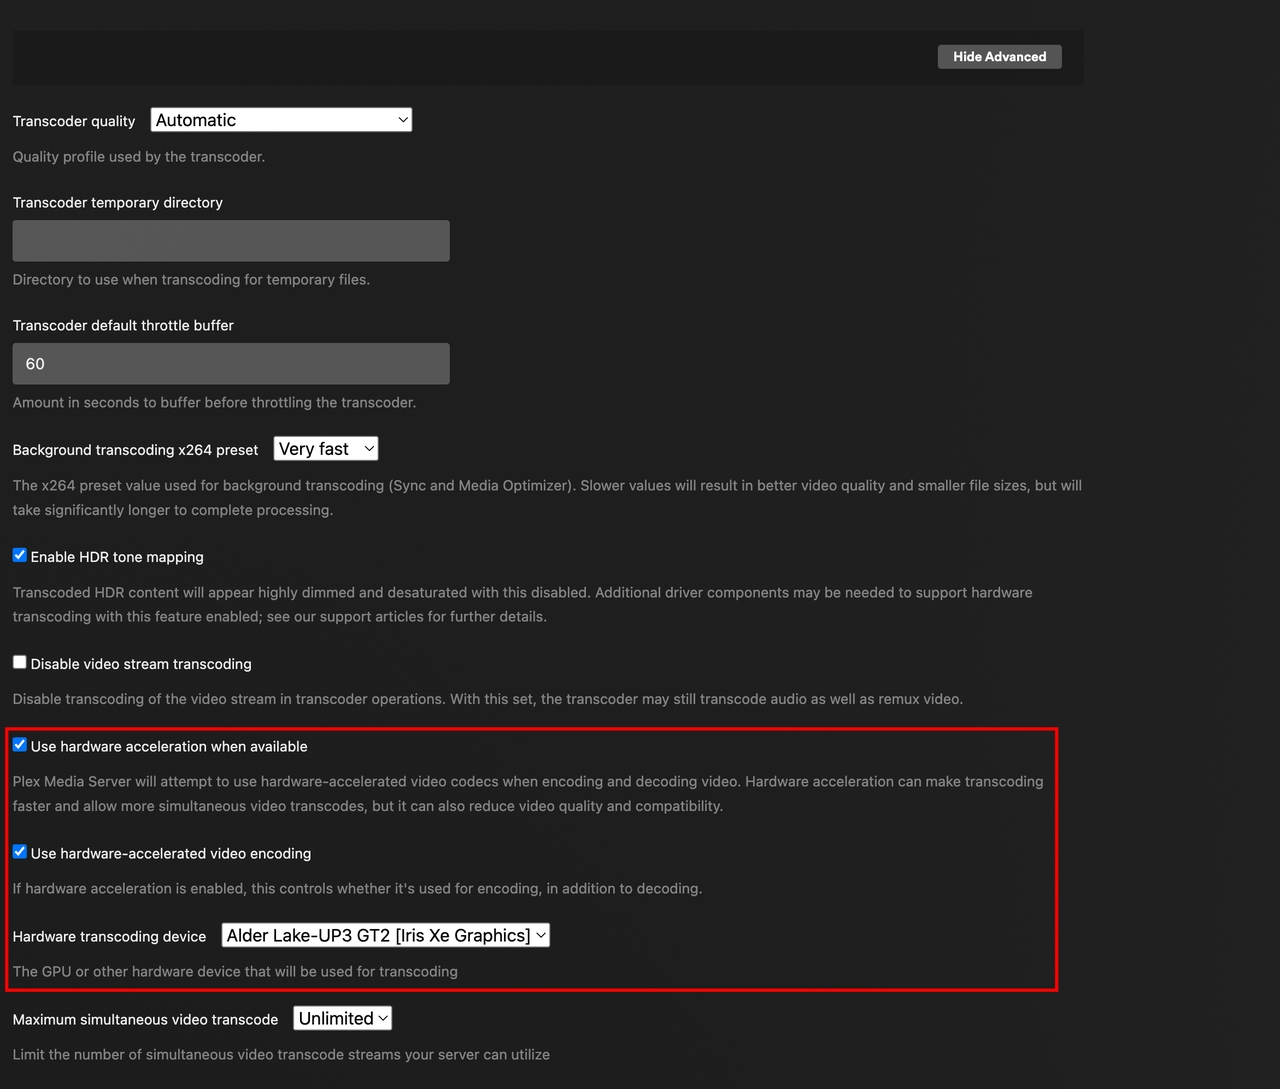
- Click Save Changes at the bottom.
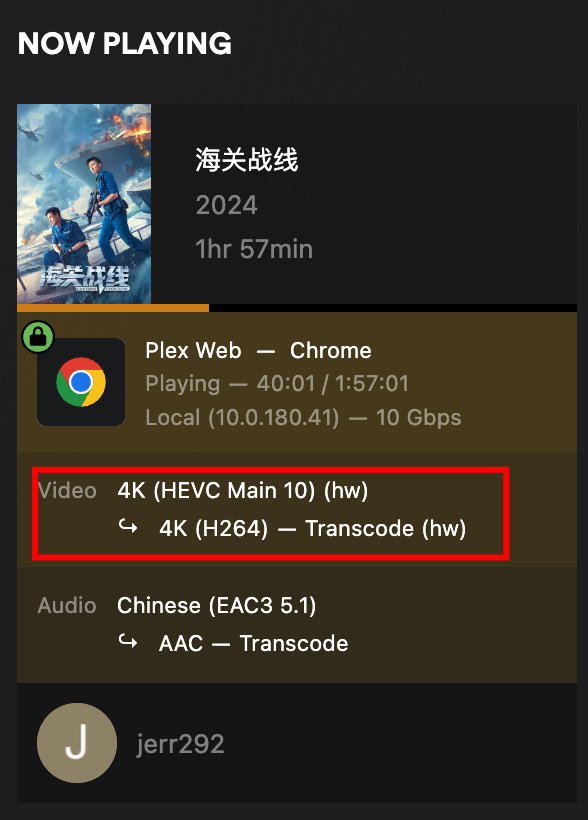
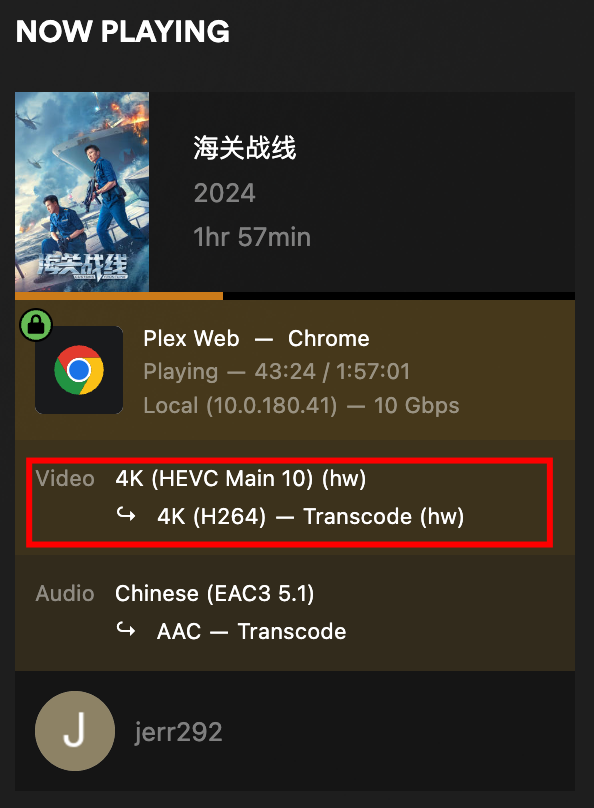
- After saving, select a movie to play and select Convert Automatically in Playback settings.
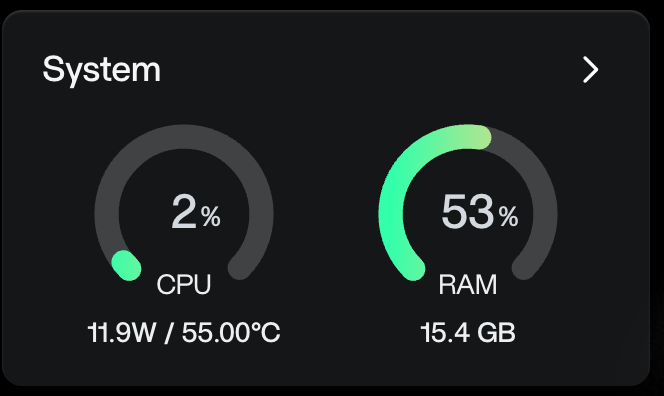
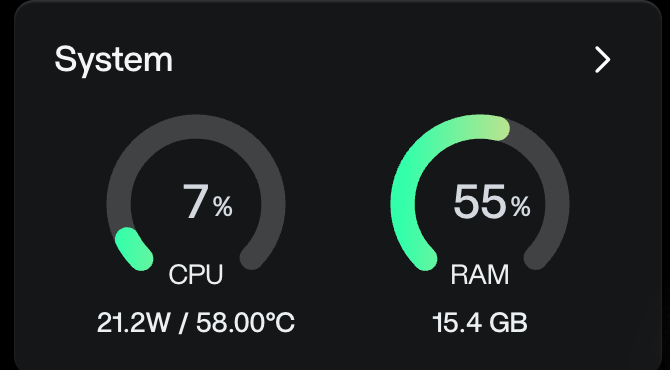
- Normally when using the built-in GPU for transcoding, it will add 4-8W of power consumption. And very little CPU power. This is very exciting.
| Before | After |
|---|---|
 |
 |
2. Using the Nvidia GPU
If you have a ZimaCube pro with a built-in Nviadia GPU, or you installed an Nvidia GPU yourself, you can follow the steps below to set it up:
- A fresh installation is recommended.
- For a list of Nvidia GPUs currently supported by ZimaOS, see the Current NVIDIA GPUs section at https://us.download.nvidia.com/XFree86/Linux-x86_64/555.58.02/README/supportedchips.html
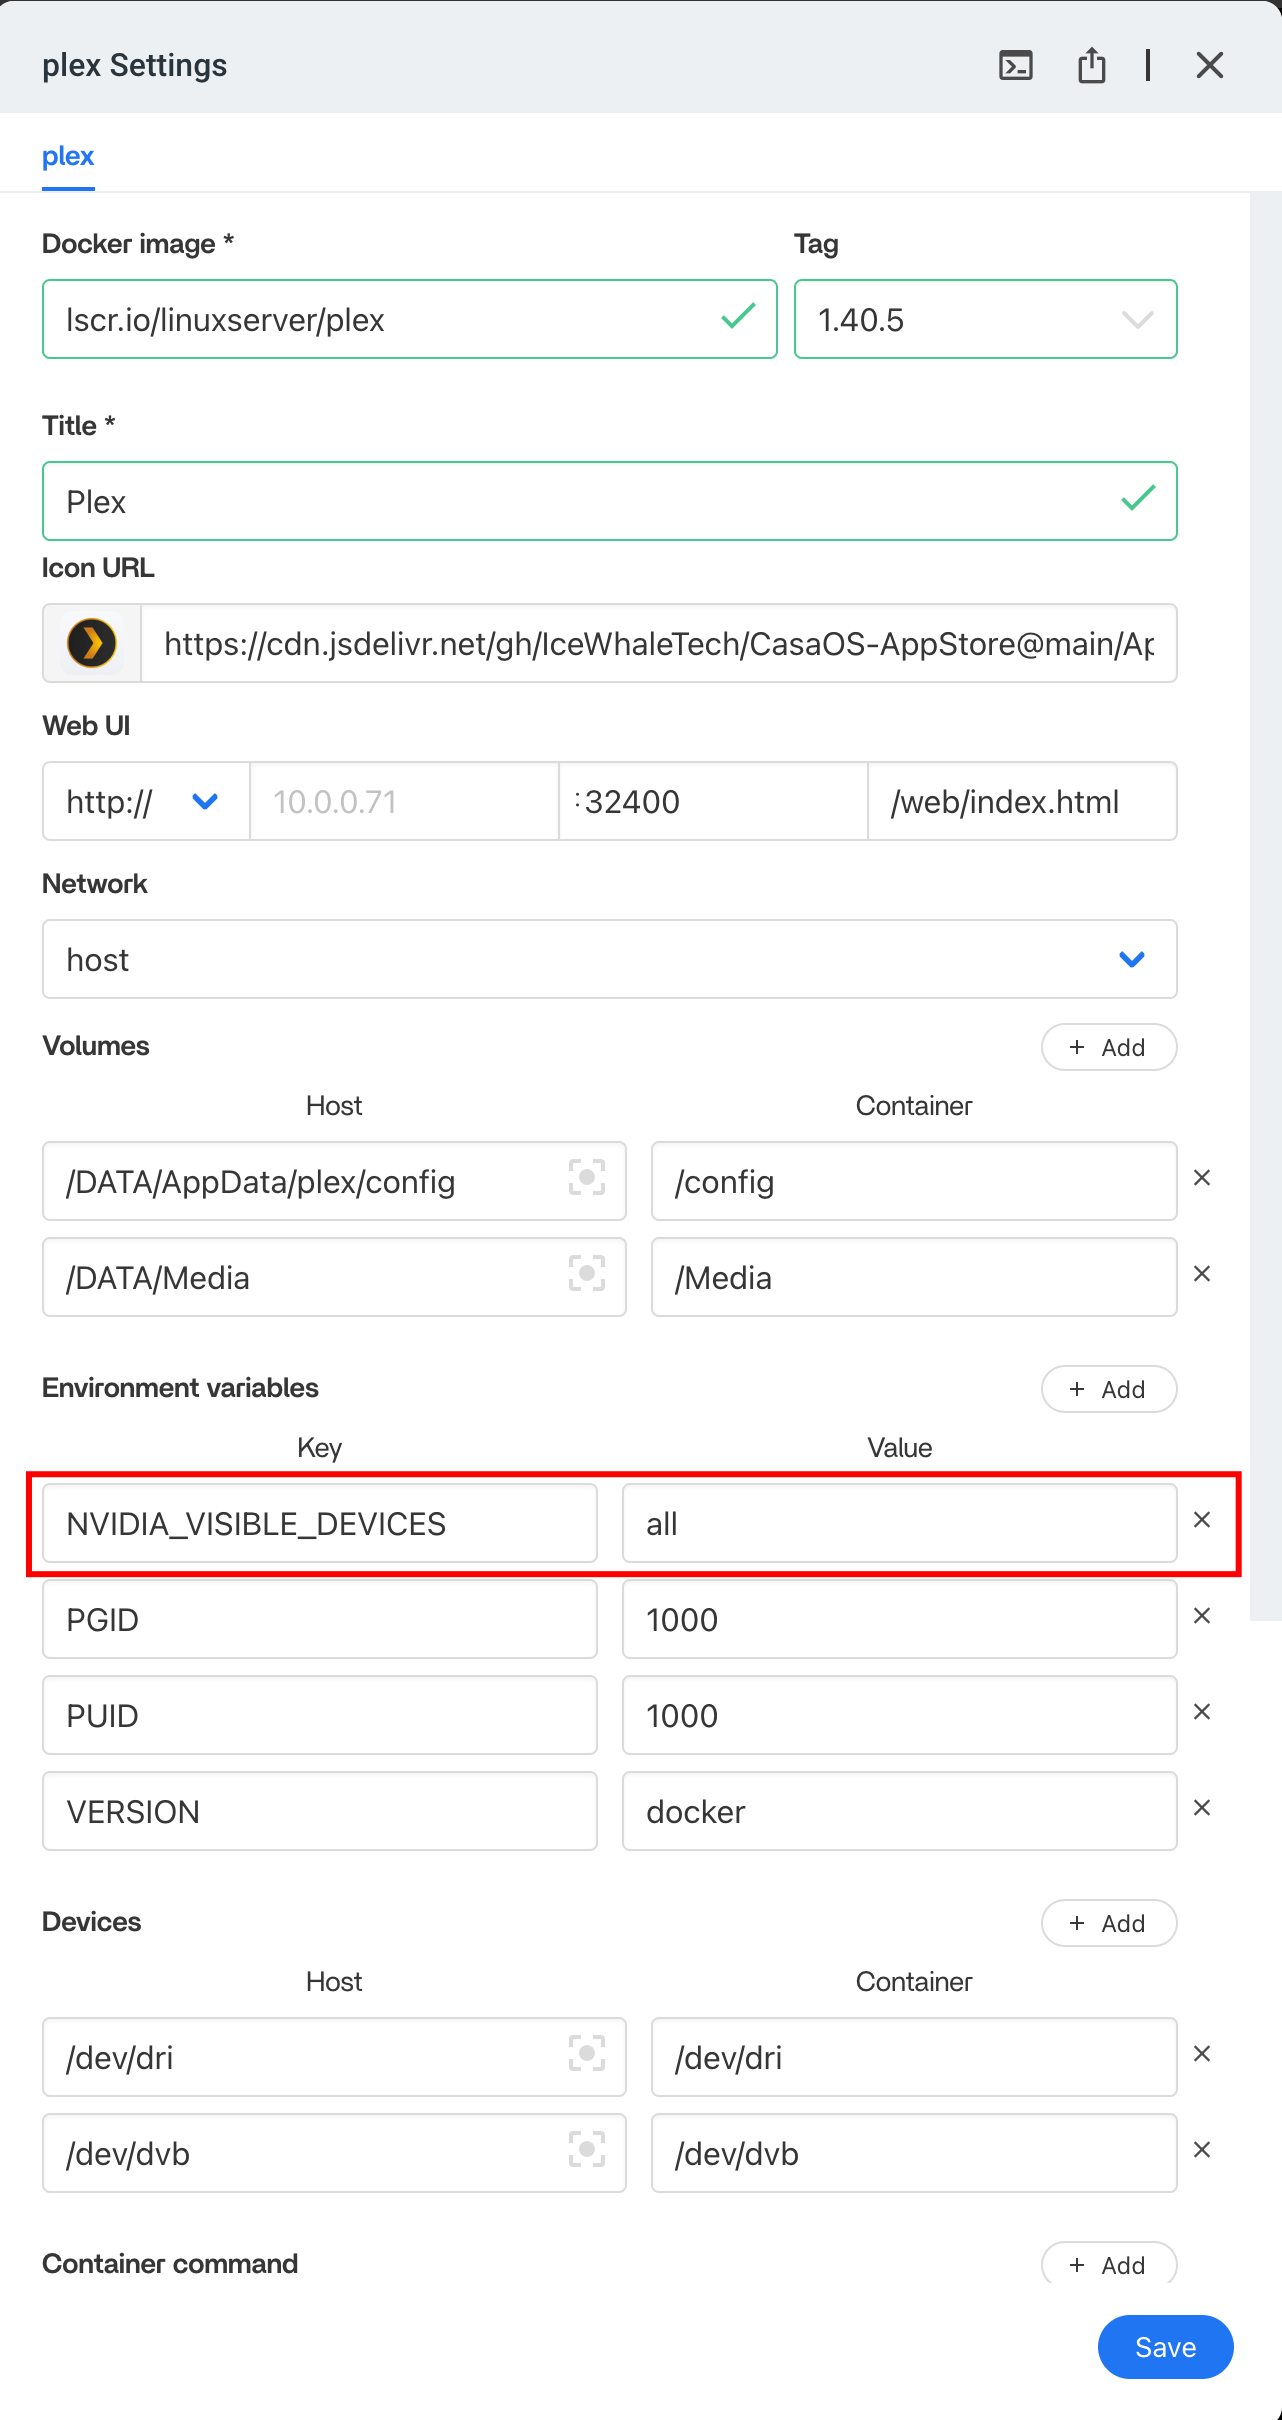
- Find the Plex app in the ZimaOS dashboard, click the three dots in the upper right corner, and click Settings in the next menu.
- Add NVIDIA_VISIBLE_DEVICES all to Environment variables in Settings, and save.
- Navigate to Settings > Server > Transcoder to access the server settings.
- Turn on Show Advanced in the upper-right corner to expose advanced settings.
- Turn on Use hardware acceleration when available.
- Choose Hardware transcoding device: Unknown (NVIDIA)
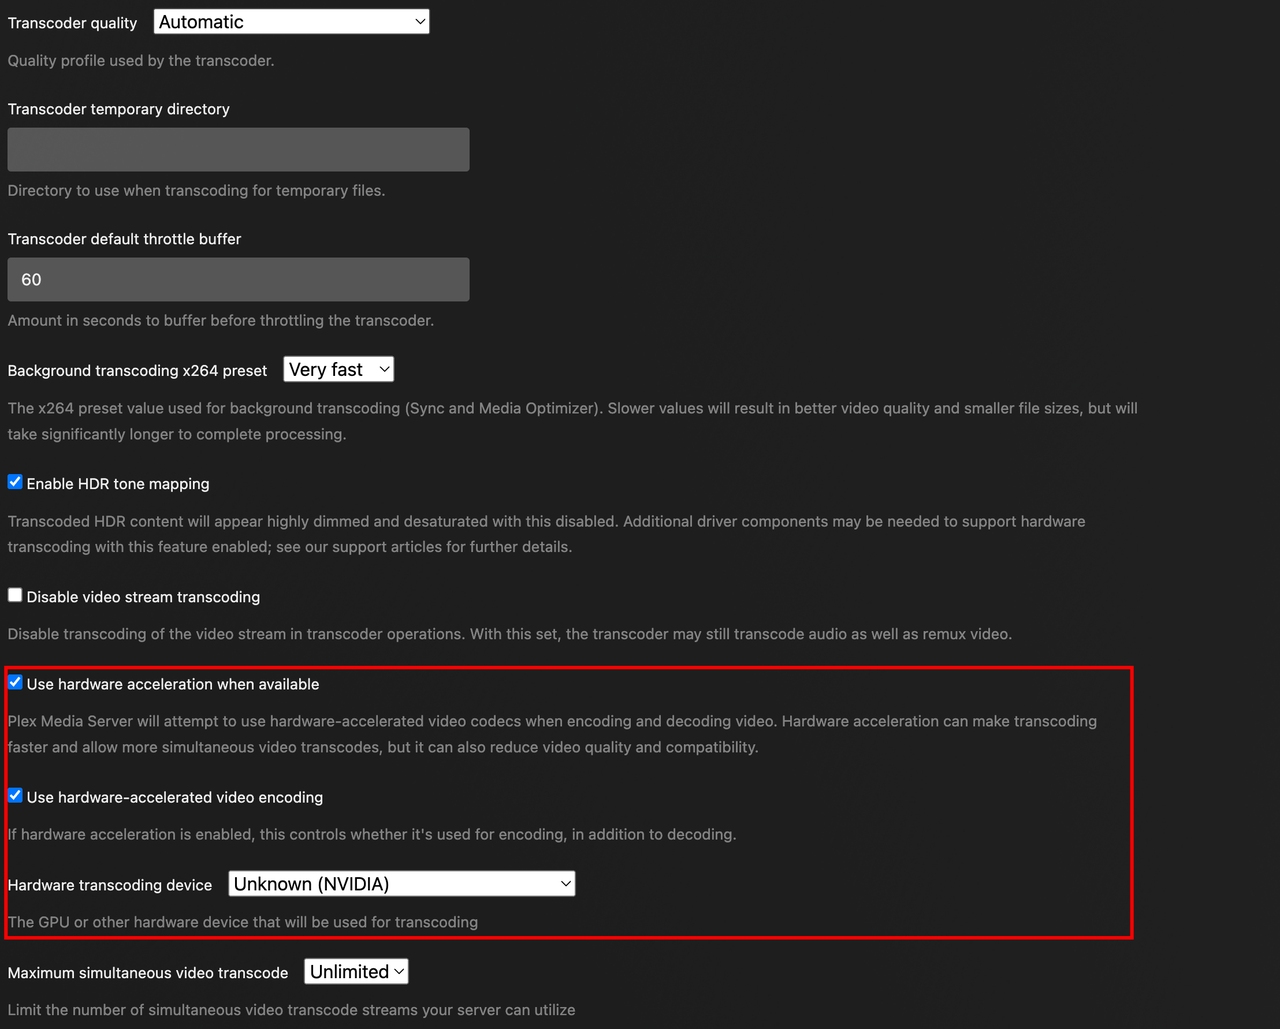
- Click Save Changes at the bottom.
- After saving, select a movie to play and select Convert Automatically in Playback settings.
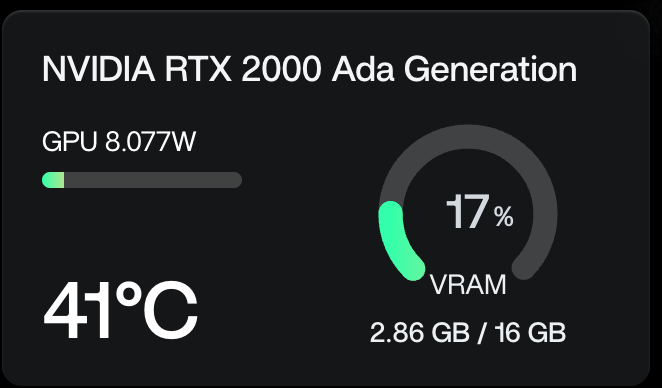
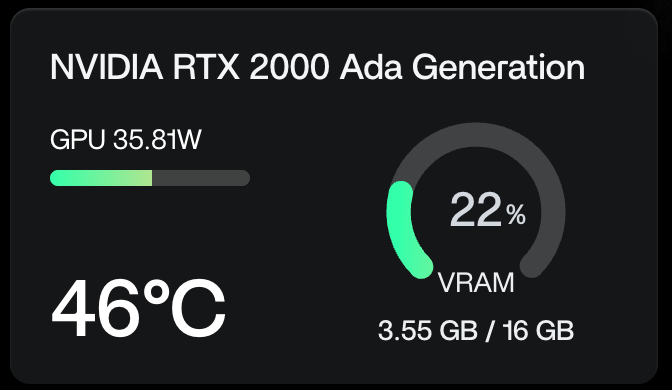
- ormally when using Nvidia GPU for transcoding, it will increase power consumption by 10-25W. At the same time, it does not consume CPU computing power at all. This is very exciting.
- Although the power consumption is higher than the built-in GPU, due to the excellent performance of Nvidia GPU, it can handle high-resolution transcoding faster and can handle multiple video streams at the same time.
| Before | After |
|---|---|
 |
 |
Concusion
Both solutions can effectively support Plex’s Hardware-Accelerated Streaming. The choice between NVIDIA and Intel GPUs depends on your specific needs and budget. If you need to handle high-resolution videos or multiple streams, an NVIDIA GPU might be the better choice. If you are more concerned with cost and power consumption, an Intel GPU might be more suitable.